DESIGN FOR A FINATE WORLD
The world is being moved and shaped at an unprecedented scale. Summer Islam in the book ‘Material Cultures: Material Reform’, identifies the harmful practices within the construction industry; a short term inefficient toxic practice with a legacy of colonial exploitation, and the need to turn to a regenerative, sustainable and efficient approach that brings the supply chain more local and advocates a system of care and maintenance that can enhance existing structures.
DESIGN OBJECTIVES:
-
I have worked as an electrician within the construction and service industry for 20 years. I have seen the impact of commercial design that creates waste, inefficient systems and exploitation. I want to disrupt wasteful practices within design whilst enhancing the use of waste into practical solutions.
-
From my experience of growing up in Africa and within self-built communities from warehouses to boats; I believe there is a way to design within communities and for communities. I have seen communities build things in response to their needs in a fluid organic way. For example in the warehouses create modular space from recycled material and in the Favelas in Brazil, which have been changed and adapted for the needs of the communities with limited resources.
Designing with communities can:
Create less waste
Be more efficient and bespoke
Serves a large proportion of people and what they need.
Creates connection and interaction with others as opposed to individualism.
Research
developing
my
design
Values

Lo-TEK- a design movement building on indigenous philosophy and vernacular infrastructure to generate sustainable, resilient, nature-based technology.
Recognises Indigenous cultures around the world as future thinking innovators rather than the incorrect idea of ineffective and primitive. Popular culture promotes a superficial fix for the environment placing everything on the individual. If we welcome design mythology, an infrastructure that connects the individual to the environment it would catalyse a global shift to a better way of living.
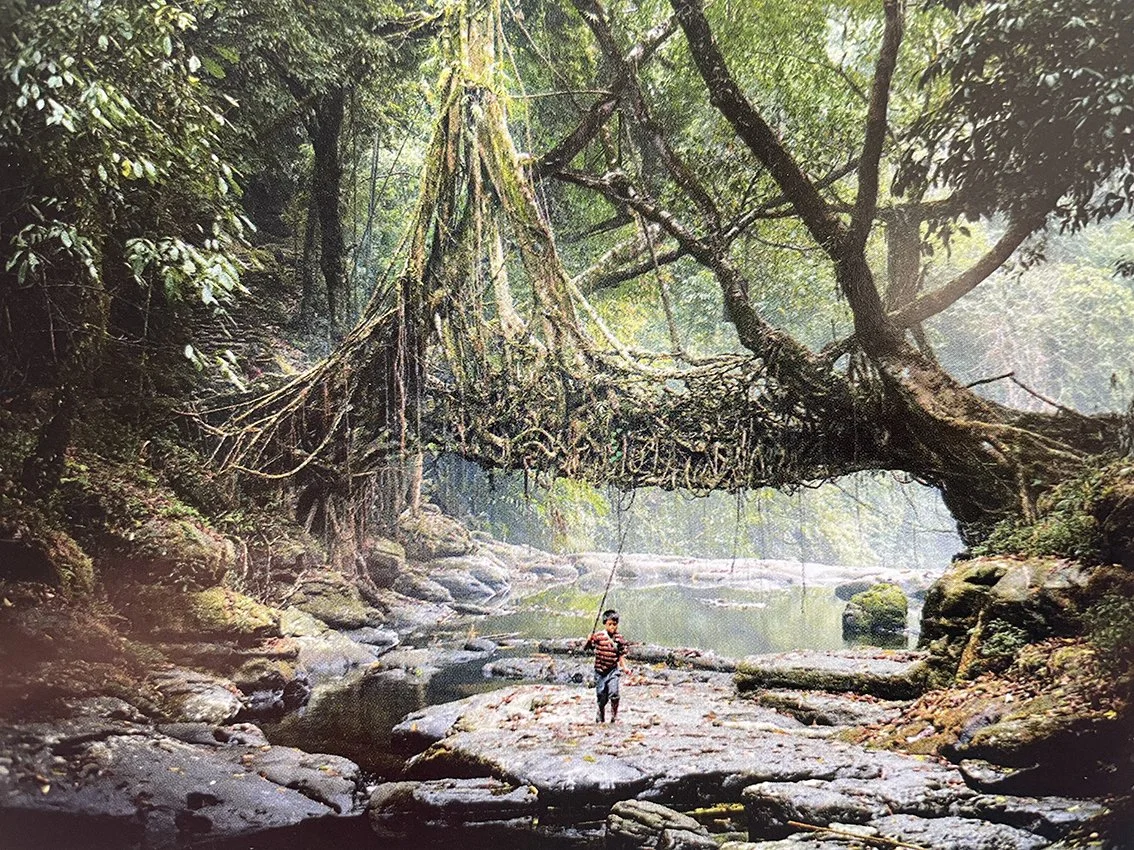
The Living Root Bridges of the Khasis, India
The Indigenous hill tribe developed a natural system of intertwining bridges from rubber trees. The only bridge capable of withstanding the monsoon rains.
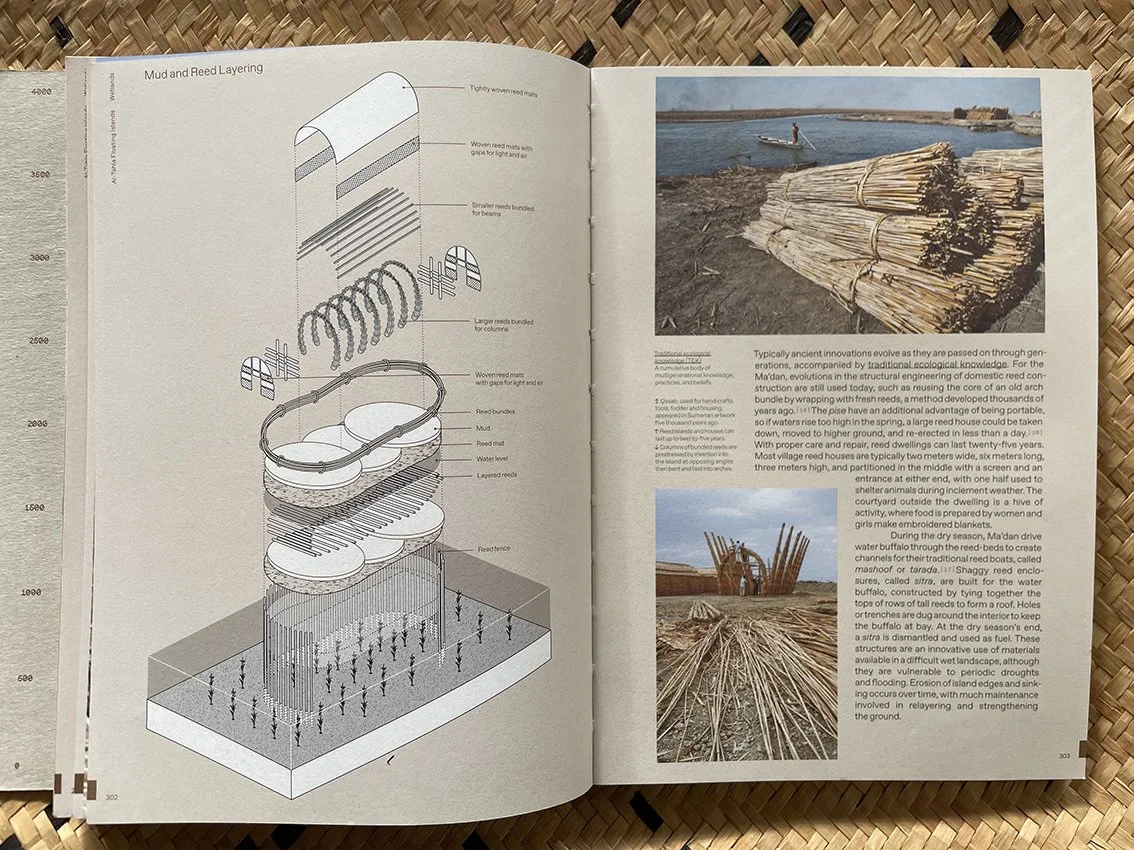
Floating Islands of Ma’dan, Iraq
This ancient system of island construction allowed civilization to flourish in an inhospitable environment, while supporting the wetland ecosystem
THE COMPOST TOILET
An off grid toilet system for collecting and reusing waste. This project demonstrates thinking about circular design.
-
The building industry and its harmful practice of outdated exploitative systems that build homes not for community but to serve monetary interests, needs disrupting. We need to enhance organic systems of development which focus on bringing people together rather than separating them. We should not have to live in little boxes disconnected by roads that serve the automobile where we are forced to spend money to interact.
To truly incorporate circular design in our homes, we need to be more than a place of shelter, but a place to truly live in. The infrastructure should be interconnected, modular, adaptable and repairable that encourage communities to grow organically, share services like washing machines and kitchens to be more efficient.
A home should provide nourishment, be able to generate its own energy, have a mini recycling plant that turns waste into valuable resources. In this way we can shift centralised power into the hands of the community.
-
Humans are the only animal that defecates into our drinking water and flush it away without a thought! This is a shortsighted wasteful practice left over from the industrial age that is harmful to the environment and separates us from the natural cycle of life. Our waste when naturally composted is a natural fertiliser packed full of the high value nutrients that can nourish our depleted soils that are constantly stripped away by mechanised systems that take and give little back.
Before Compost Loos are adapted by the mainstream, we need to enhance the designs and systems of communities already using compost toilets. One such community is the live aboard canal boat cruisers of which I am a member.
-
We need to enhance the designs and systems of communities already using compost toilets. The toilet design needs to be simple and comfortable to use. The management of waste needs to be:
more effective for it to generate energy
Creating quality compost safe to use.
More information needs to be provided to the public in terms of access and circular usage and its possibilities.
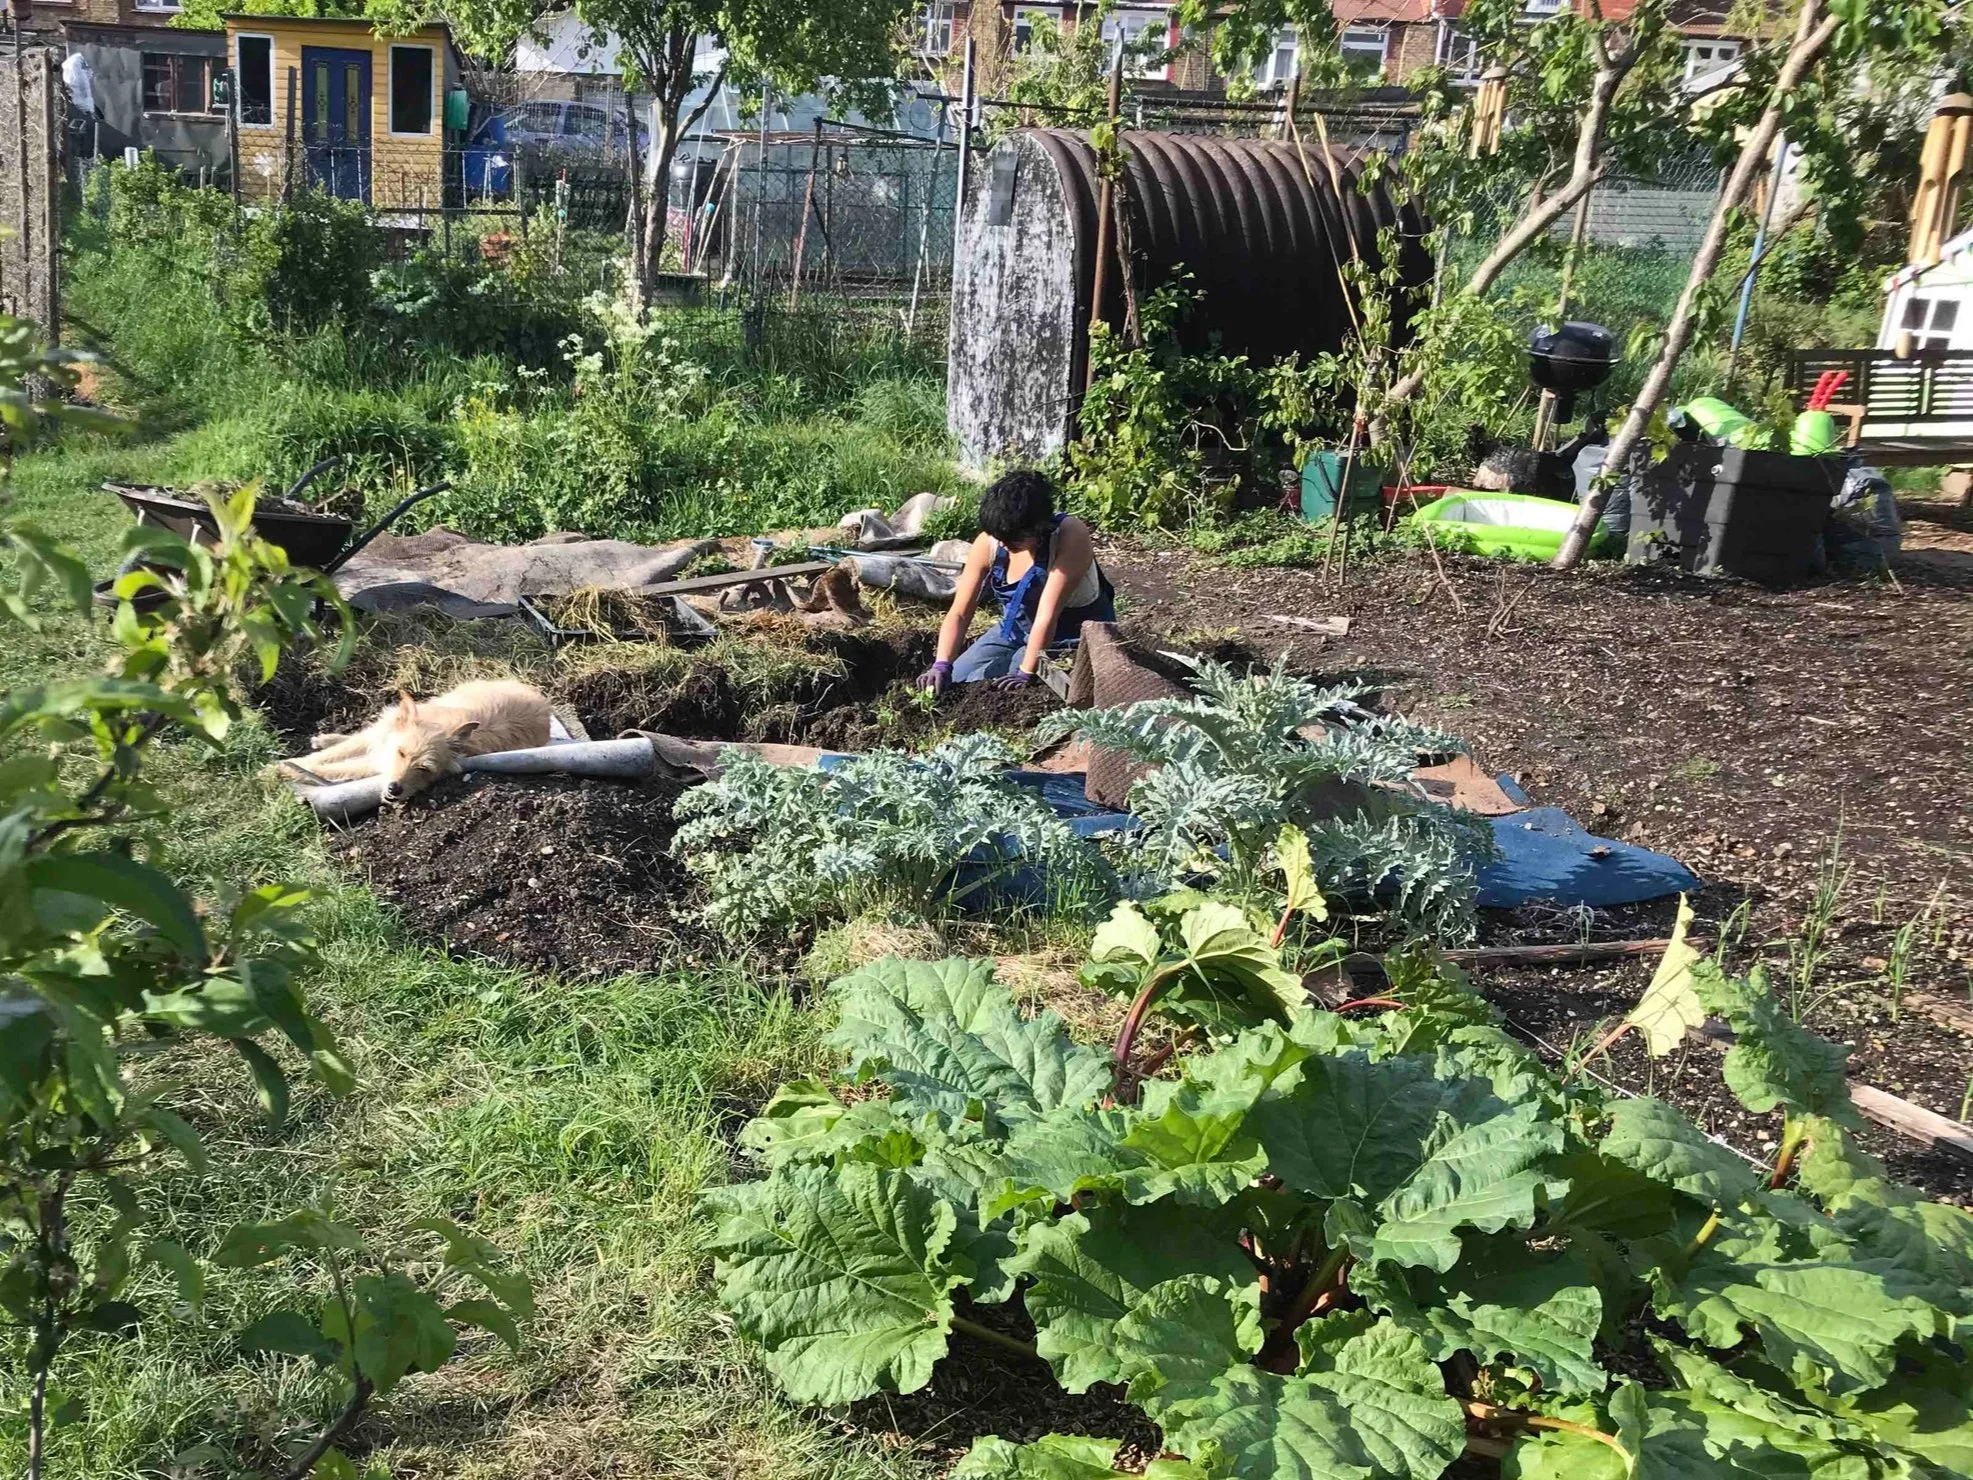
From My Allotment Where we have regenerated soil with toilet compost.
Research
-
As a boater on the London Canals, my partner and I found compost toilets to be the best solution for a toilet on a boat. Other options like:
the pump out tank toilets rely on failing infrastructure along the canal and require a dedicated tank on your boat, which most boaters don't have. It’s costly, cumbersome and smelly.
Cassette toilets like those found in caravans, use harmful chemicals, which produce a foul smell, they stop the breakdown of waste and are harmful to the environment. Cassette toilets need to be emptied into Elsan points along the river which are not always accessible. Boaters can travel far carrying waste to these points.
In the past, I have built a bespoke custom toilet out of plywood, to fit in the tight space of our boat, an issue that most boaters face. The design was limited by collection containers which dictated the height and a boxy shape was less comfortable and ergonomic to use. This DIY method of using materials not purposely designed makes the management and cleaning of the toilet cumbersome.
We had an allotment where we were able to transport our waste to be composted more effectively. Most boaters don't have this option and store the waste on their boat for until it is safely composted, before disposing it. There is now a collection service available to boaters in a certain catchment areas.
-
I interviewed a number of other boaters who have adopted the compost toilet as their solution to off grid living on the London canals, to gain a better insight into the needs of other users. Some of the key points are as follows:
Compost toilets are more pleasant and simple to manage compared to the pump out or cassette toilet option.
Selecting their compost toilet they were presented with two options, make their own or purchase a high end model because options in between were not nice to look at or would not work in their space. People use design templates to make their own.
Some designs like Homary look good but then have lots of unnecessary tech that needs electricity, a limited resource on a boat. A design would be better without power and moving parts.
Cover material like sawdust used in the function of a compost toilet is messy and can put dust in the air.
Guests unfamiliar with compost toilets can find it embarrassing to use.
Designs are not all gender freindly. Men find it hard to pee sitting down and standing will make a mess. Women need to be able to aim into the right compartment which can be difficult pending body type.
A well designed compost toilet needs to have a nice aesthetic, and have the advantage of being movable, compared to a built in DIY version.
It needs to be airtight, Catch overflow or spillage and be easy to clean.
-
There are a number of manufacturers of compost toilets on the market, ranging between the high end and the DIY.
Homary has a number of high tech compost toilets that have a sleek design, they look good, are expensive and have a lot of unnecessary electronics which require electricity not great for boaters' needs.
Kildwick Is a German brand that sells a number of modular solutions which are low tech and essentially two containers housed in a box, they are not comfortable to use or nice to look at
New company Circular Revolution.org provides a zero waste toilet collection service for London boaters composting toilets. They aim to improve sanitation management for the benefit of society and use waste material to improve soil quality and regenerate soil health.
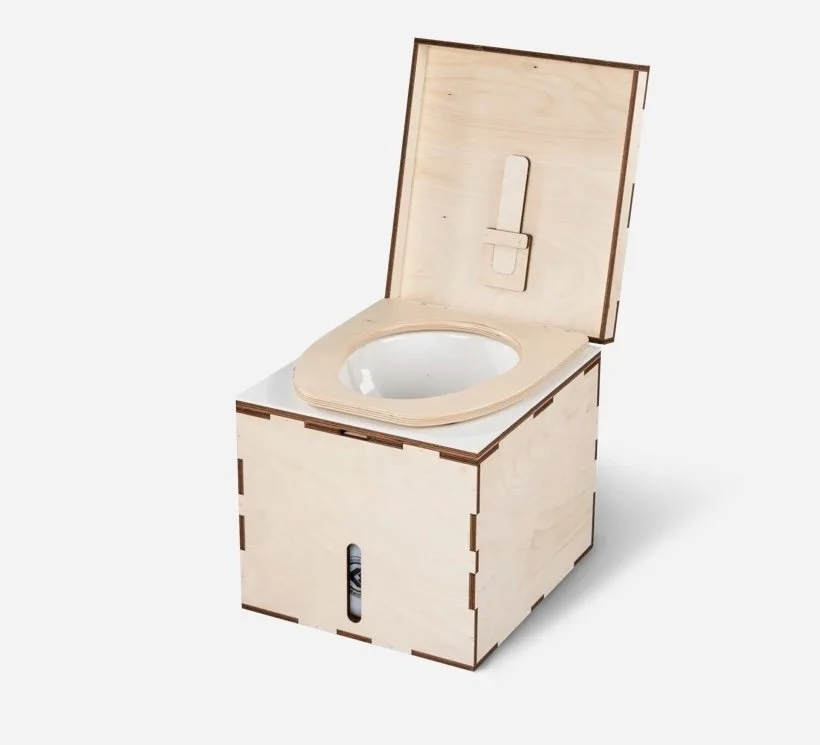
KILDWICK - DIY compost toilet
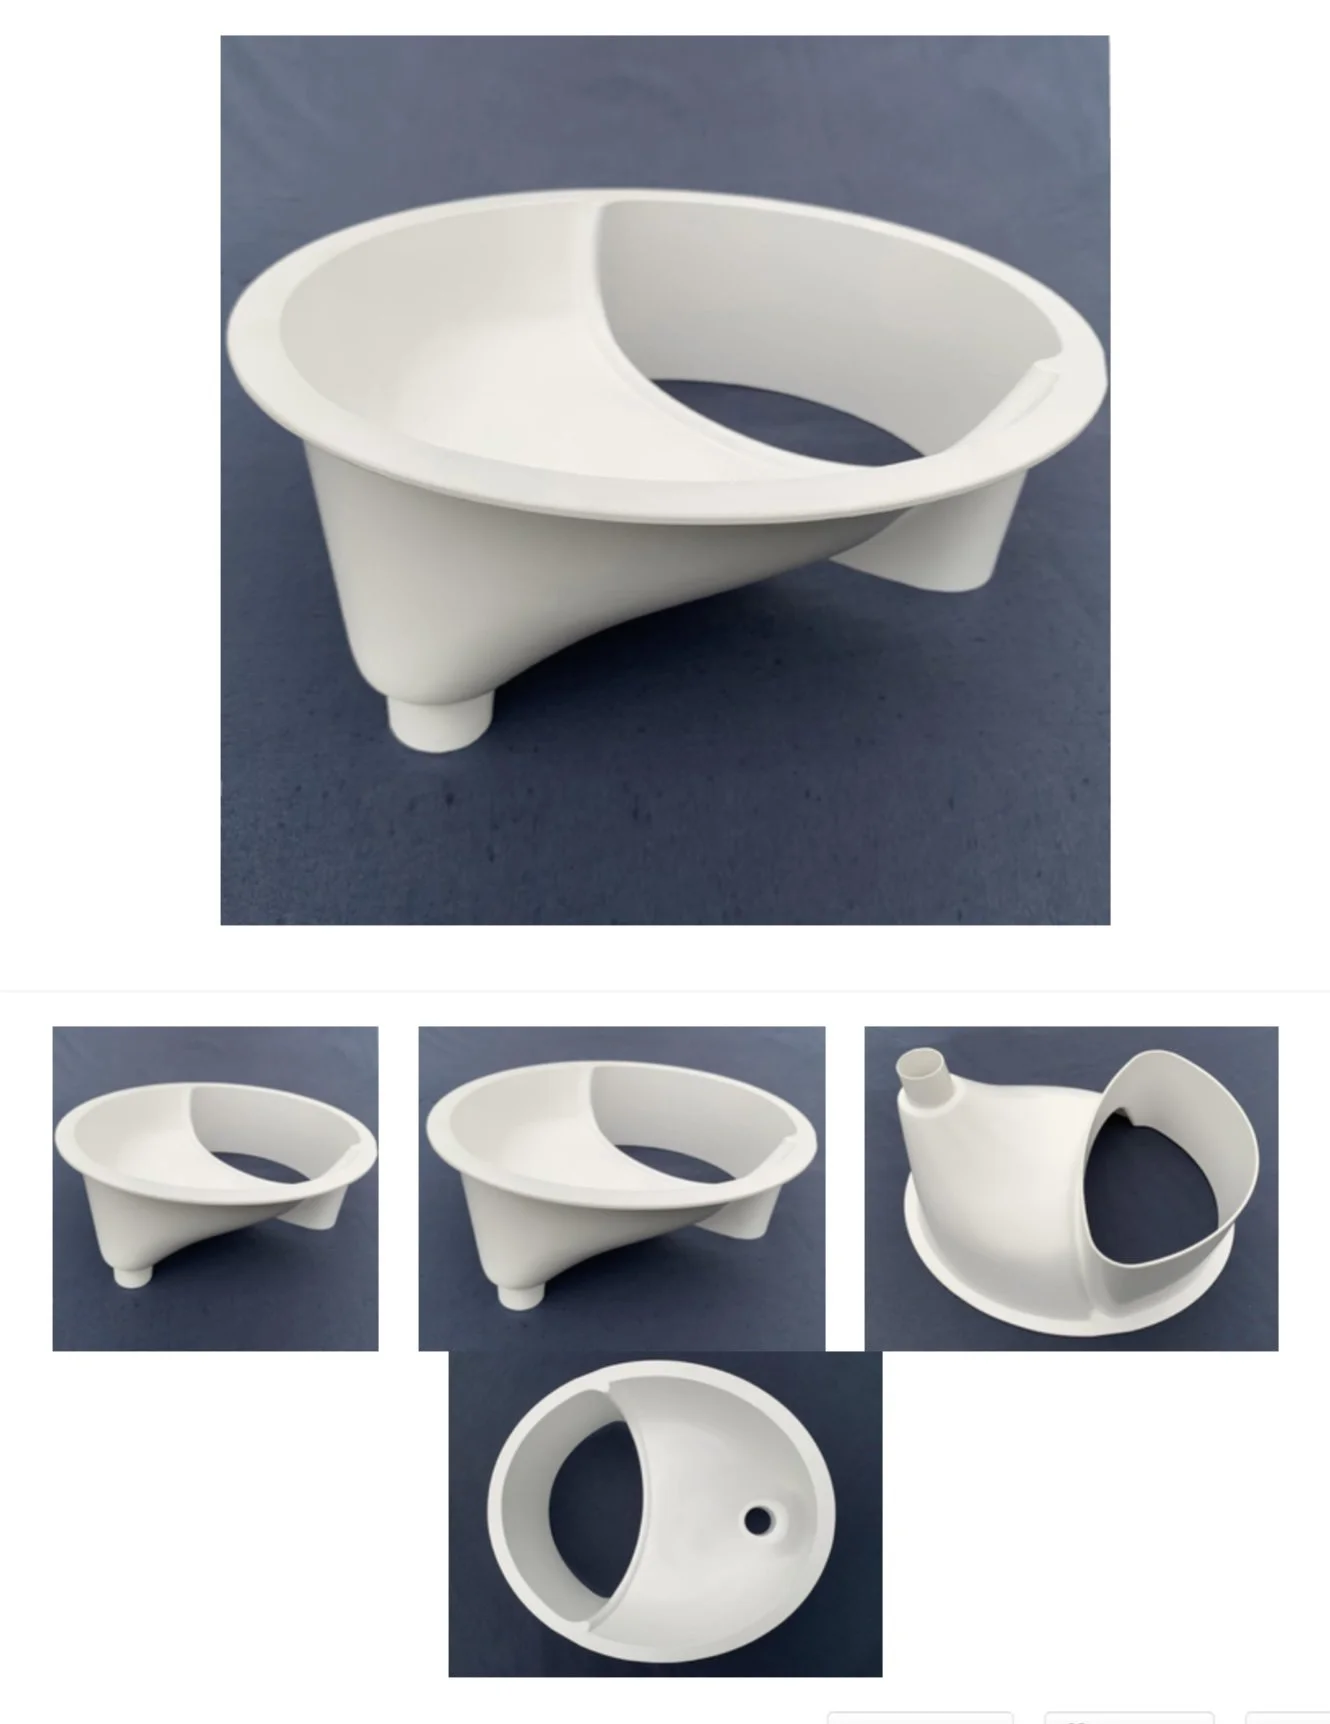
Standard separator to divide wet and solid waste
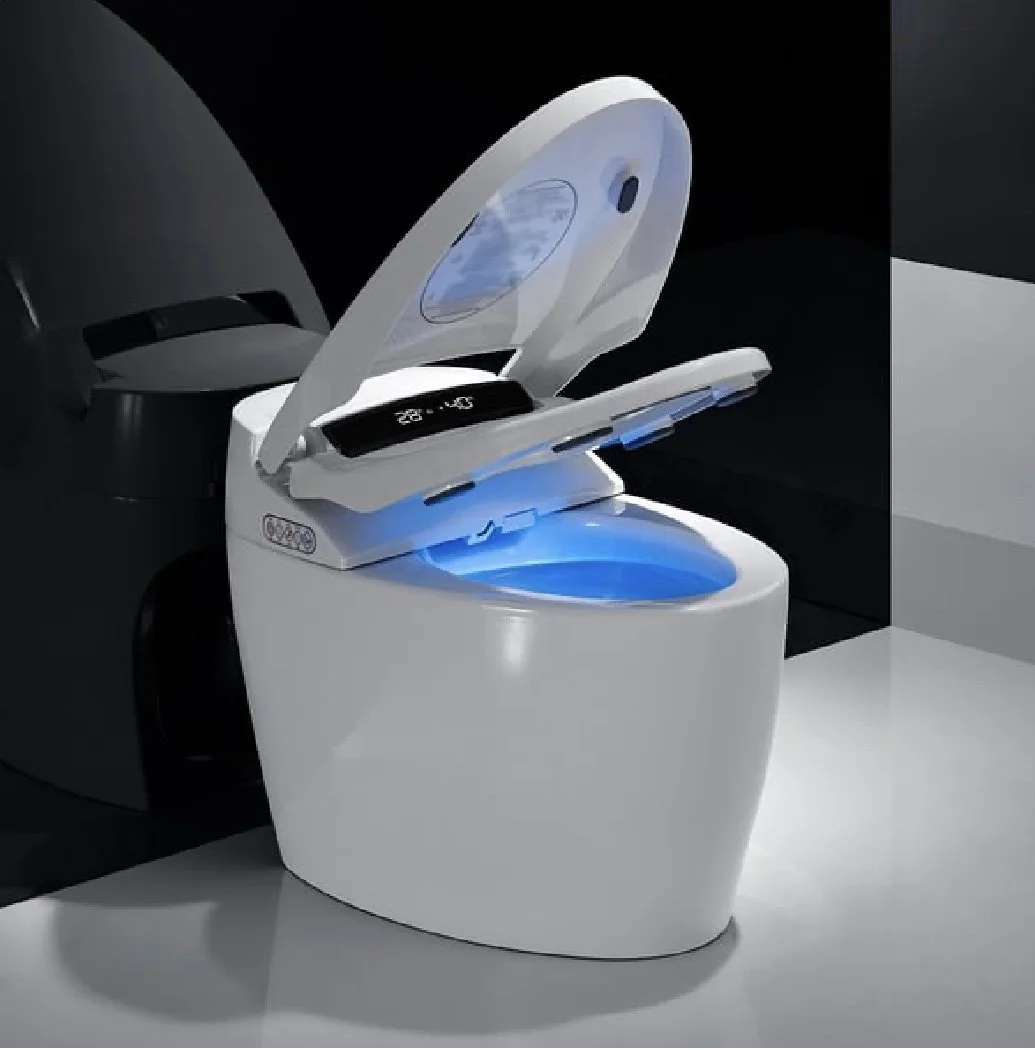
Homary - High tech compost toilet
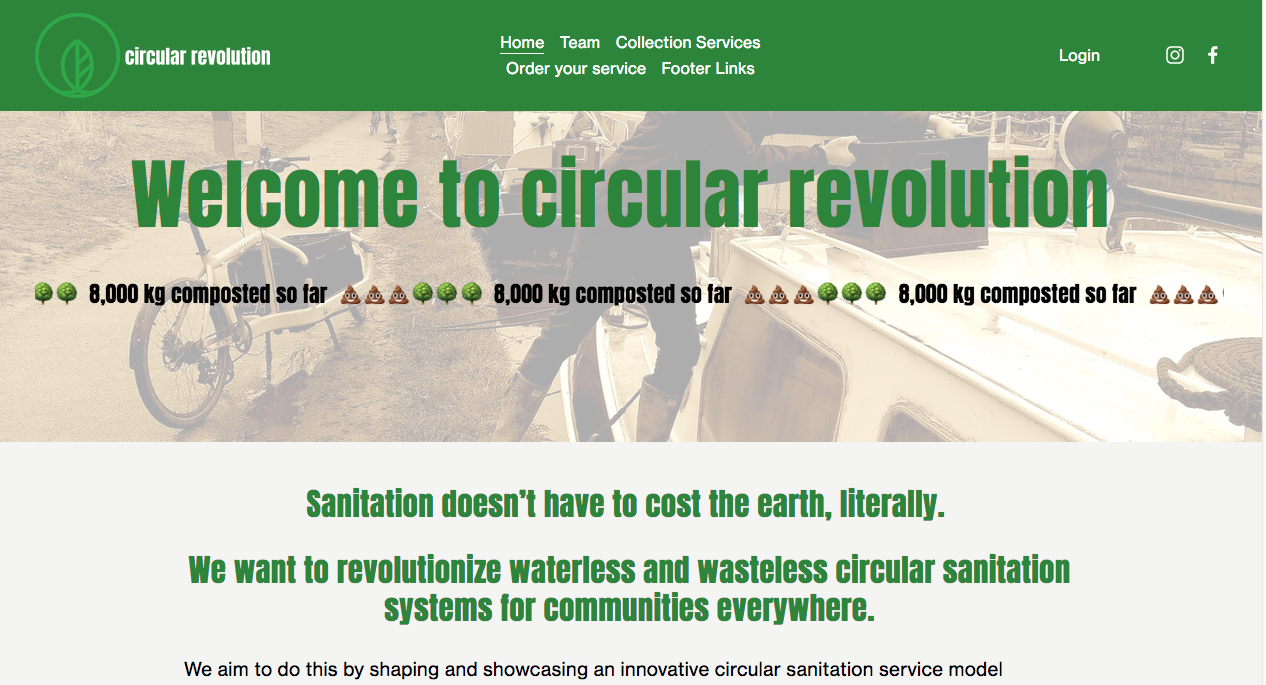
Company Circular Revolution, who collect composted waste.
Boaters need an effective system in place for them to manage their compost waste more responsibly. The company Circular Revolution would be a great company to collaborate with to enhance infrastructure and develop a system that users can access via an App, building a circular economy.
DESIGN DEVELOPMENT
Design Goals
Improve existing urine and solid separator designs that adapt to different genders and body types.
Design purpose made urine and solid collection containers that seamlessly fit together, saving space and easy to clean and decanted into transport containers.
The toilet must be ergonomic and comfortable to sit on.
Use robust storage boxes that can be easily collected, transported and stored.
Contact CRT to improve facilities where compost waste can be collected alongside elsan points.
Have purpose built anaerobic digesters around the canal or on allotments where the composting process can be sped up, monitored and tested.
Capture Methane for energy conversion.
Develop an App that builds a community providing information to users such as: the positive impact they have made to the environment, with added testing information for safety, and track the speed of turning waste to compost.
Drop off and collection points can be mapped out and collection requests made via the App.
A circular economy can be accessed via the app where users can trade credits for money depending on their inputs like; managing a facility, transporting material, providing material and using compost.
DESIGN SOLUTIONS:
-
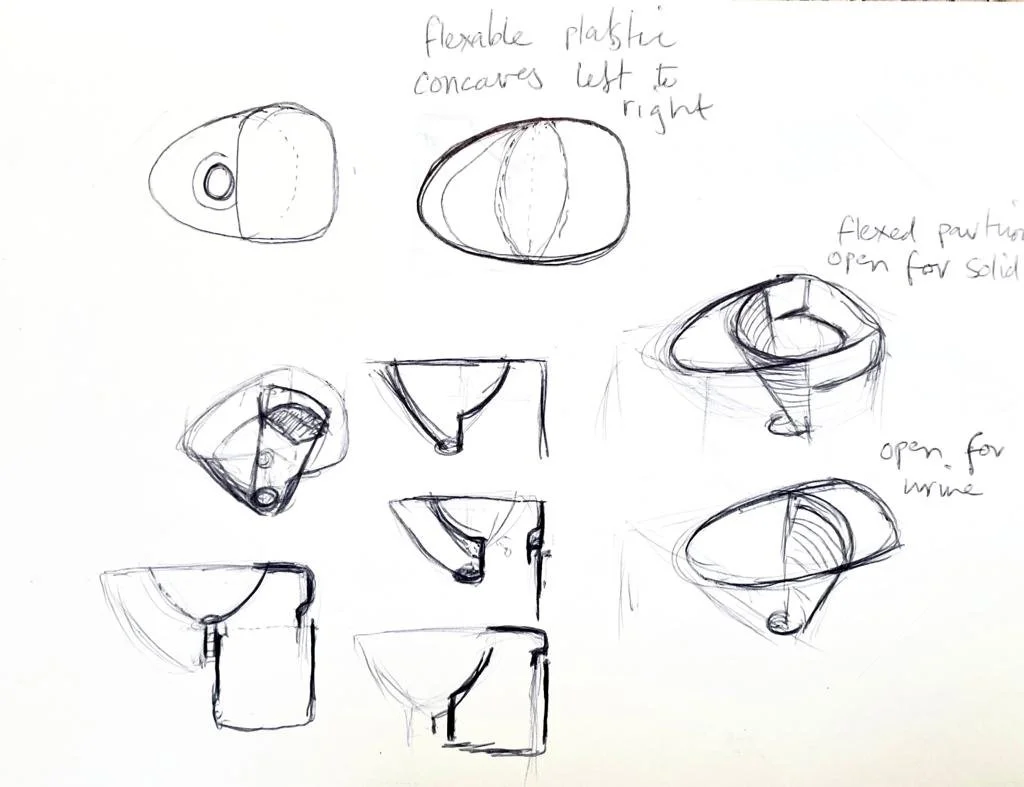
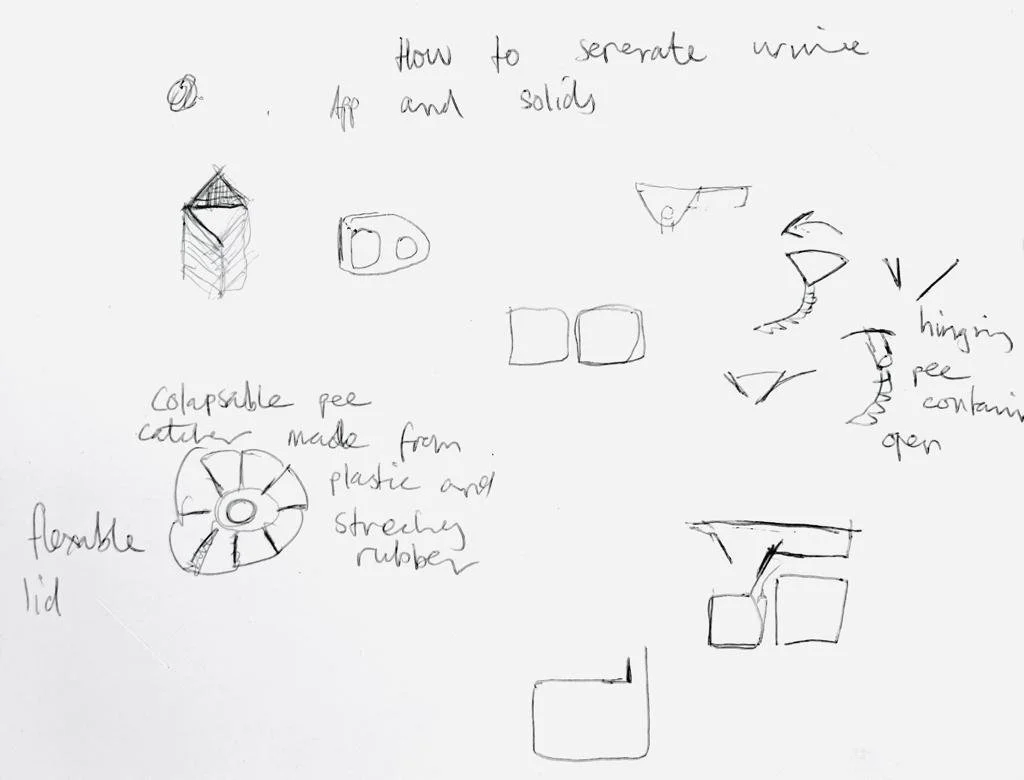
A separator that has will expand over the large opening for the solids allowing urine to be funnelled down a small central opening to the urine container. The separator can then contract exposing the opening for the solids.
The separator would be made of 3 segments of flexible plastic fabricated with seams between that allow them to be manipulated into two positions.
This design would have a lot of wear and tear, be harder to maintain and keep clean.
-
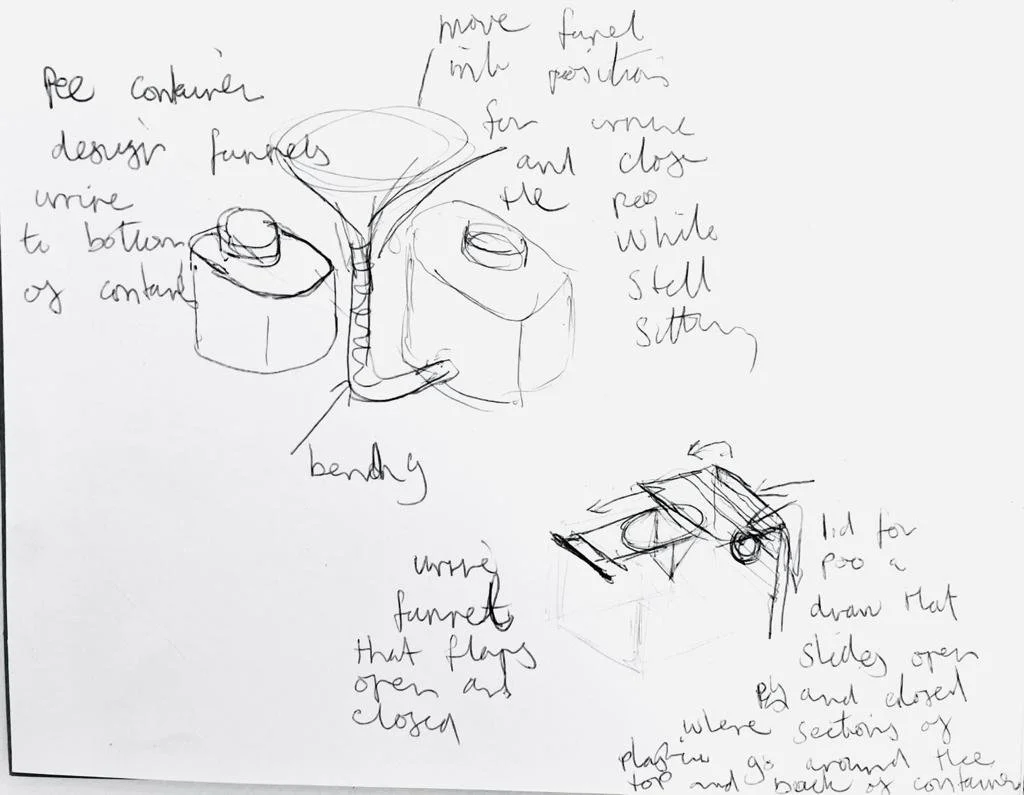
The segment idea brought me to the sliding draw, slats that pull open and closed
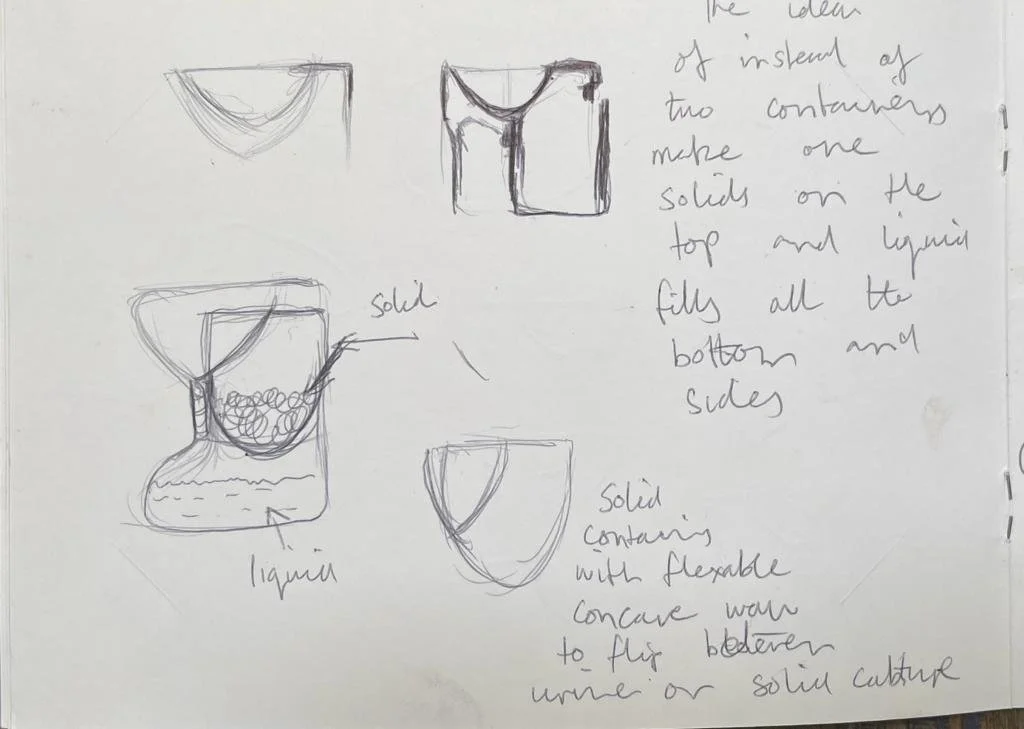
In order to help visualise the mechanics of the toilet I drew in side elevation to iterating my ideas on the page trying to work out an elegant solution that would enhance what the compost loo could do.
-
To address the issues users faced with the urine separator I explored the idea of:
flexible cone shape divider that the user would be able to adjust between the openings for the various functions: solving the issue of any waste material that landed on the sides might become a projectile.
A draw could be pulled open and closed : issues with wear and tear, too complicated.
The urine collection funnel could be set to the centre instead of the front: would allow urination in the standing position.
-
The solid container is designed to be curved like an egg that nestles in the nest like liquid container: This allows a sleek ergonomic design that is comfortable to sit on and easy to empty into transport containers.
THIS SHOW X
DESIGN PROCESS
Prototype - Modelling
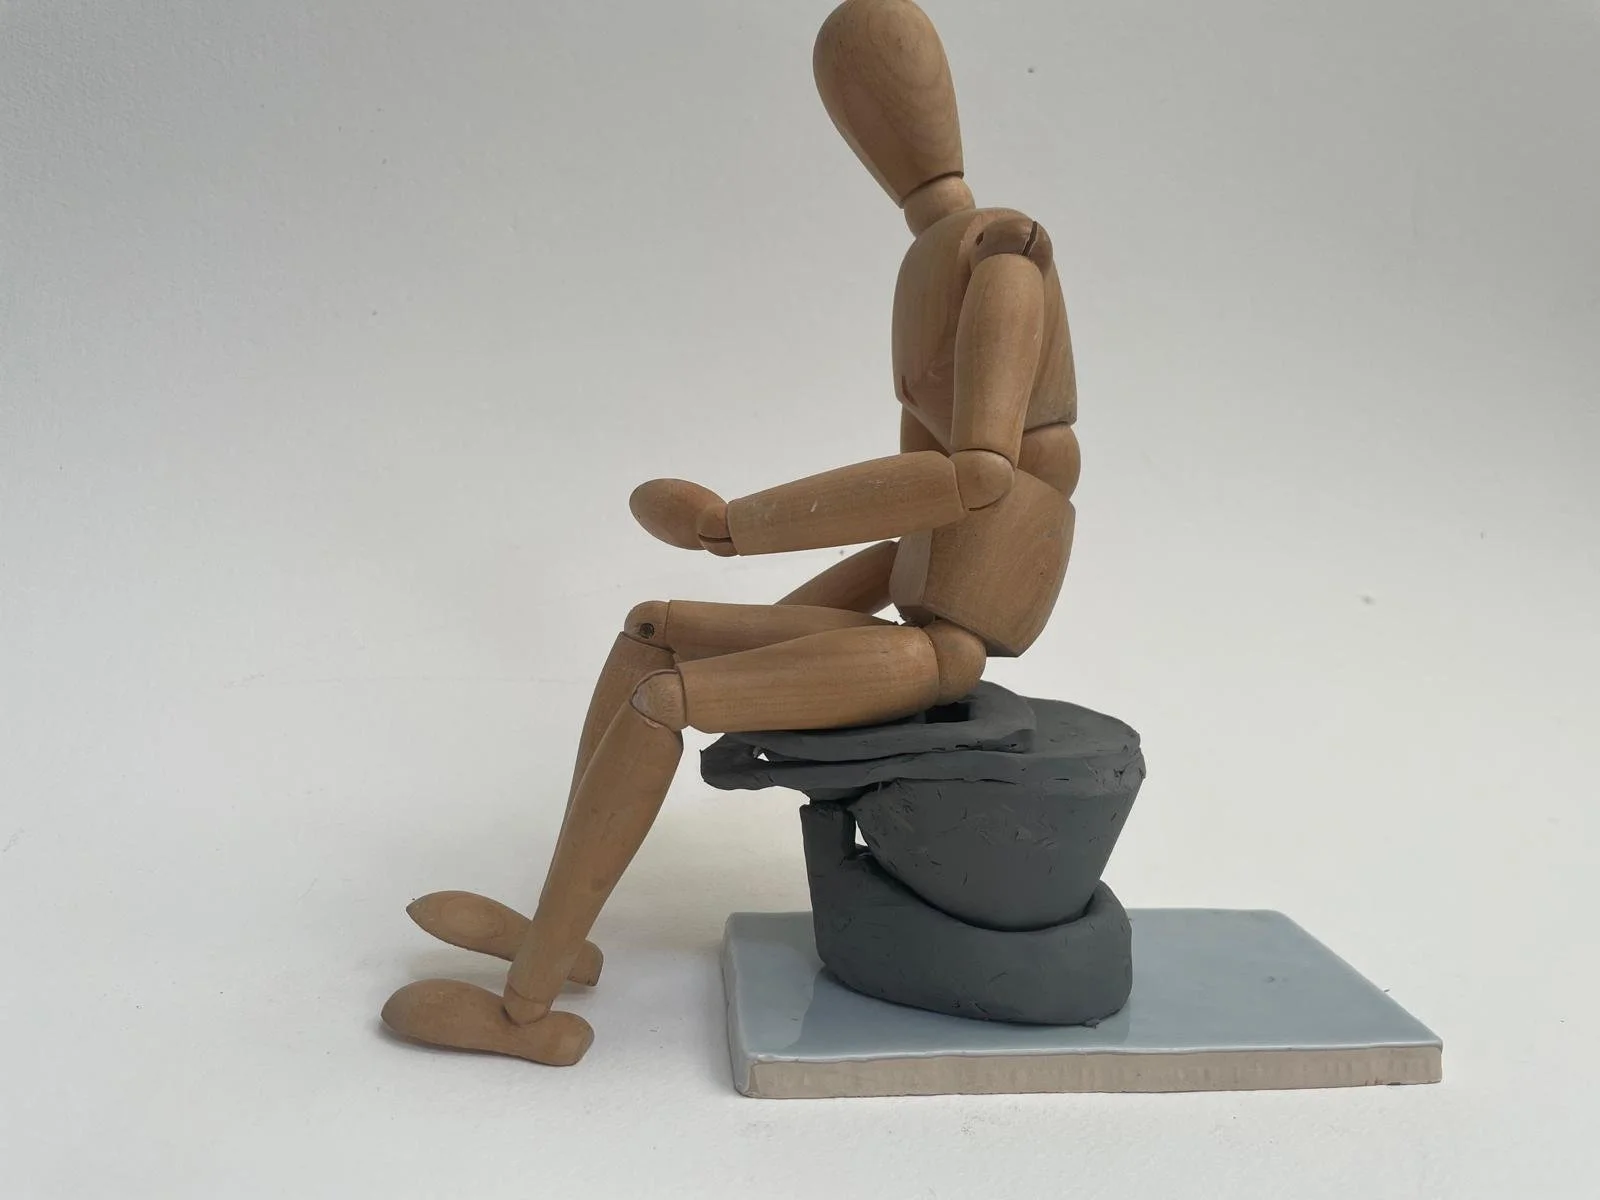
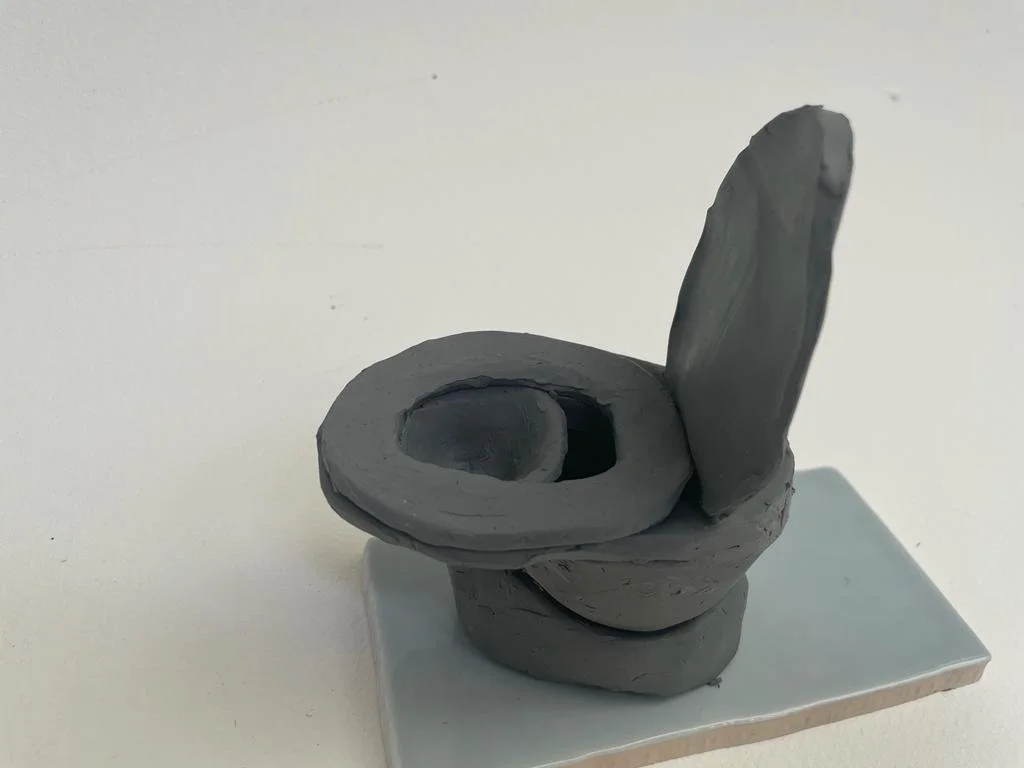
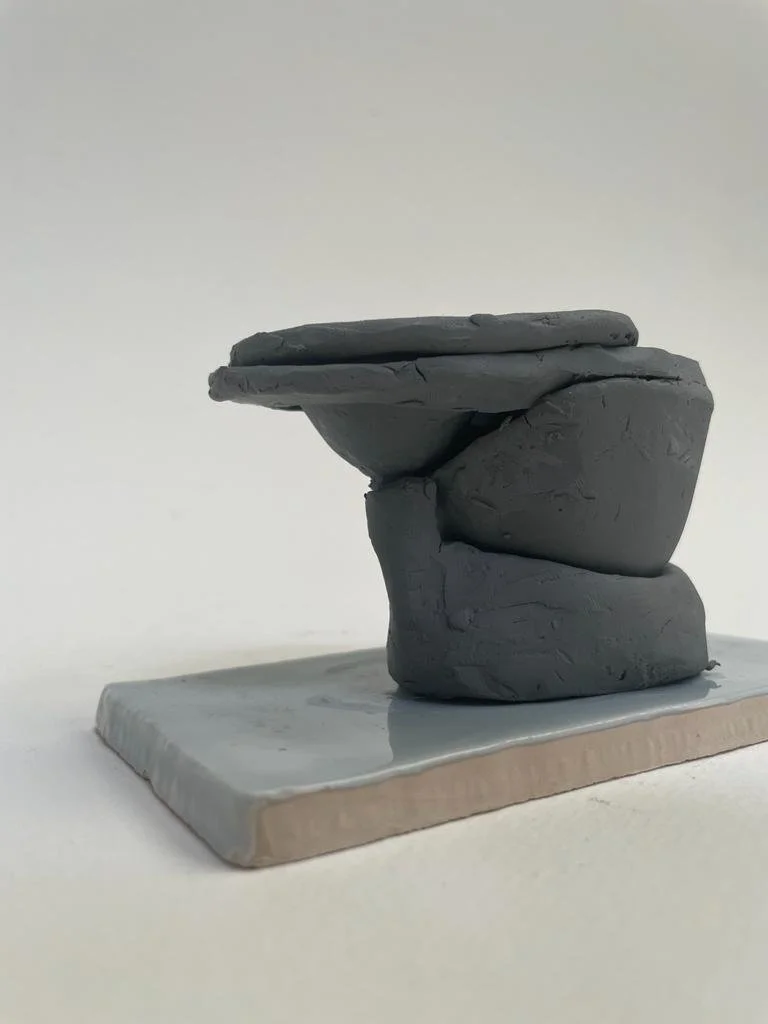
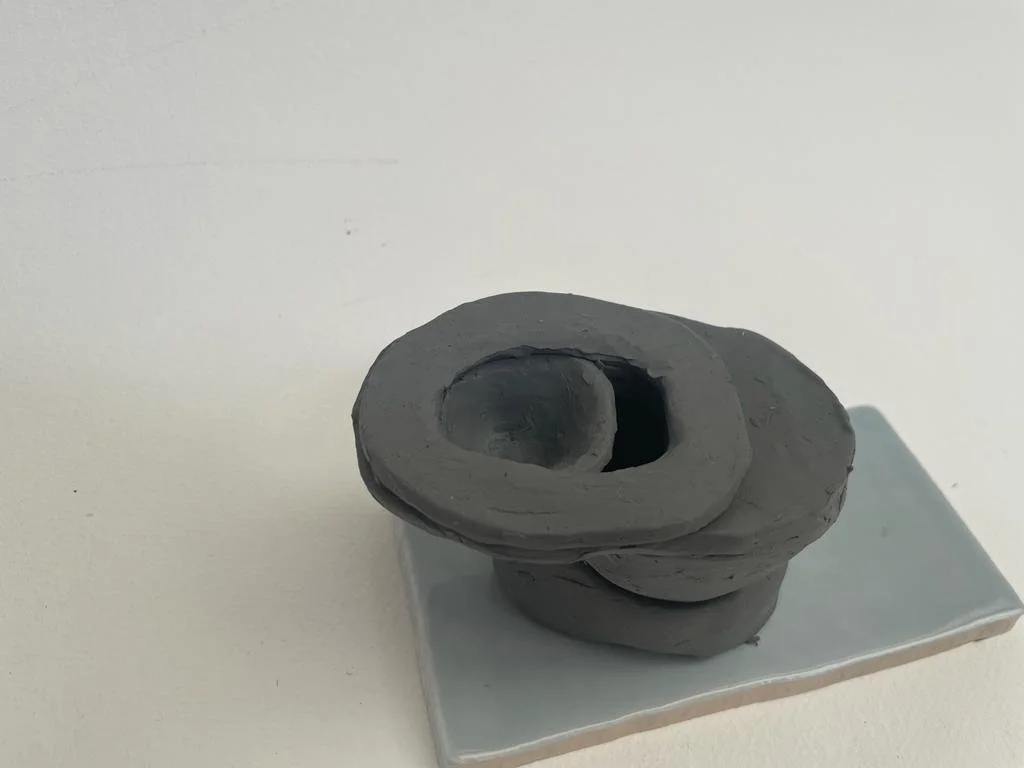
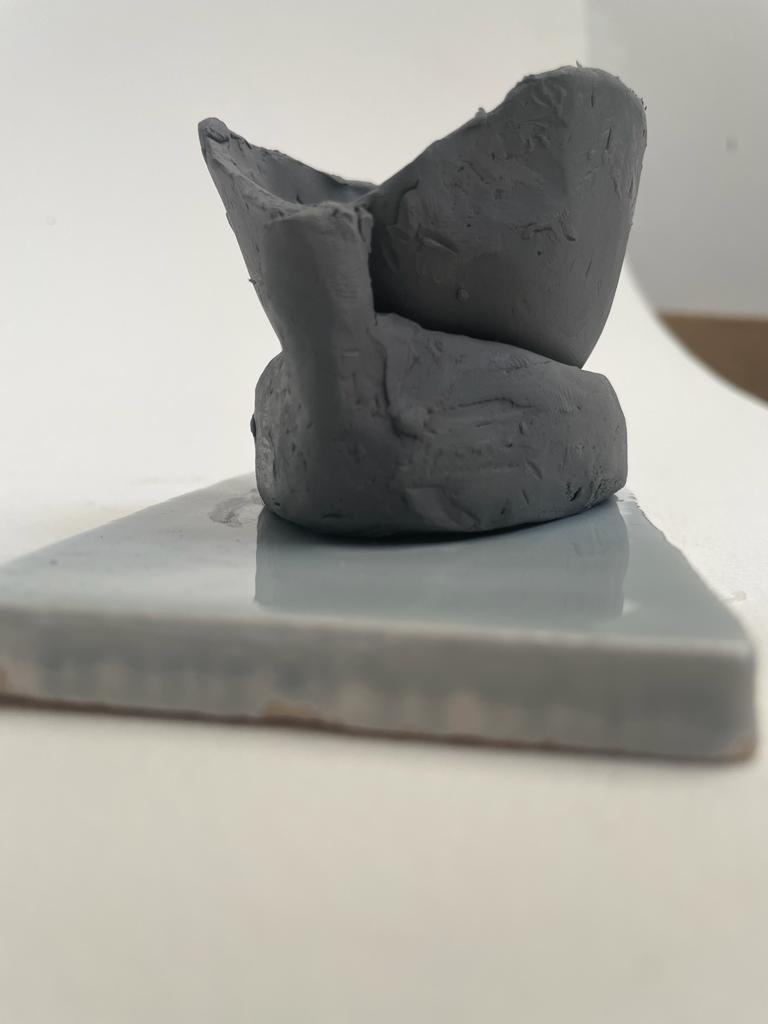
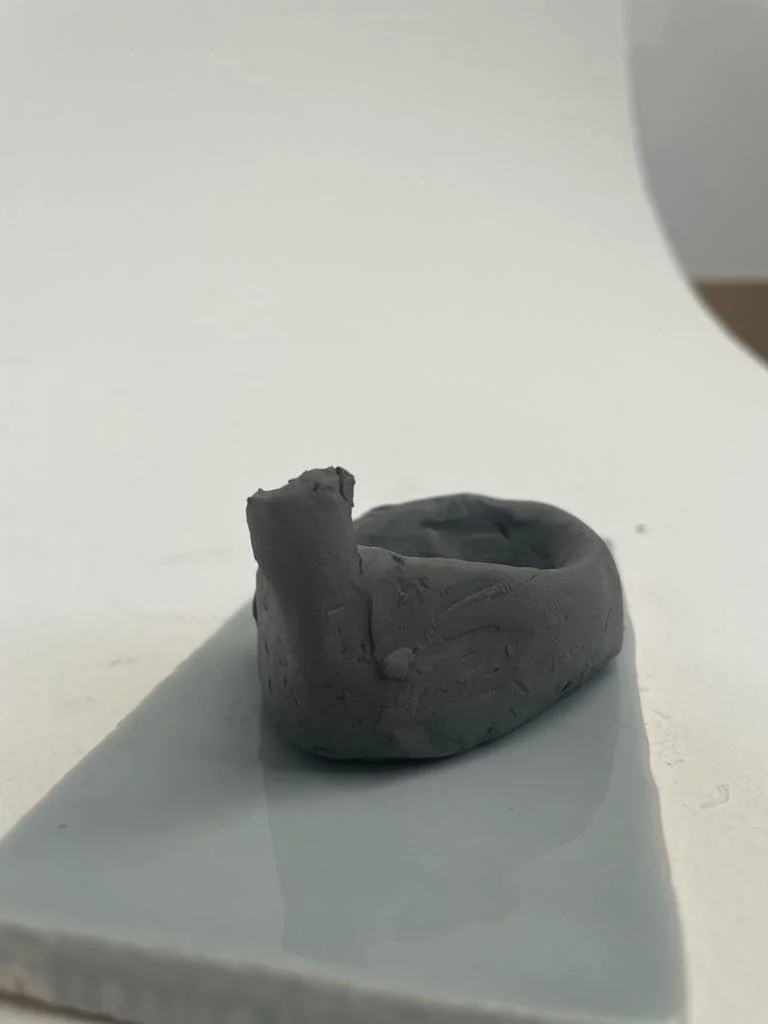
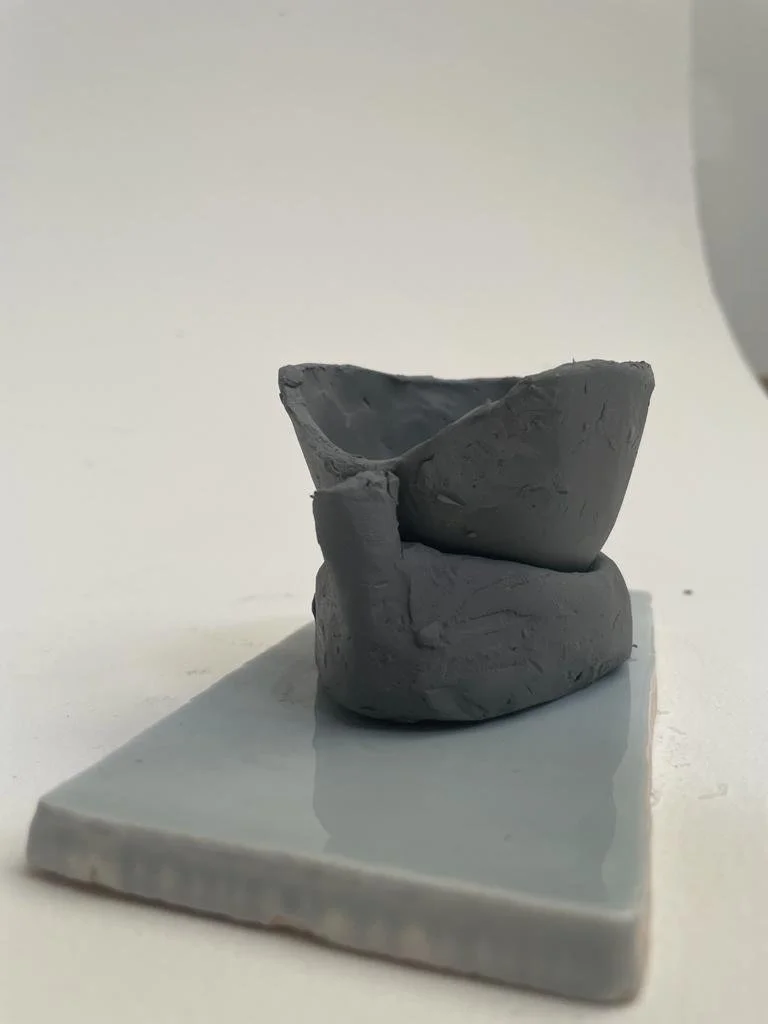
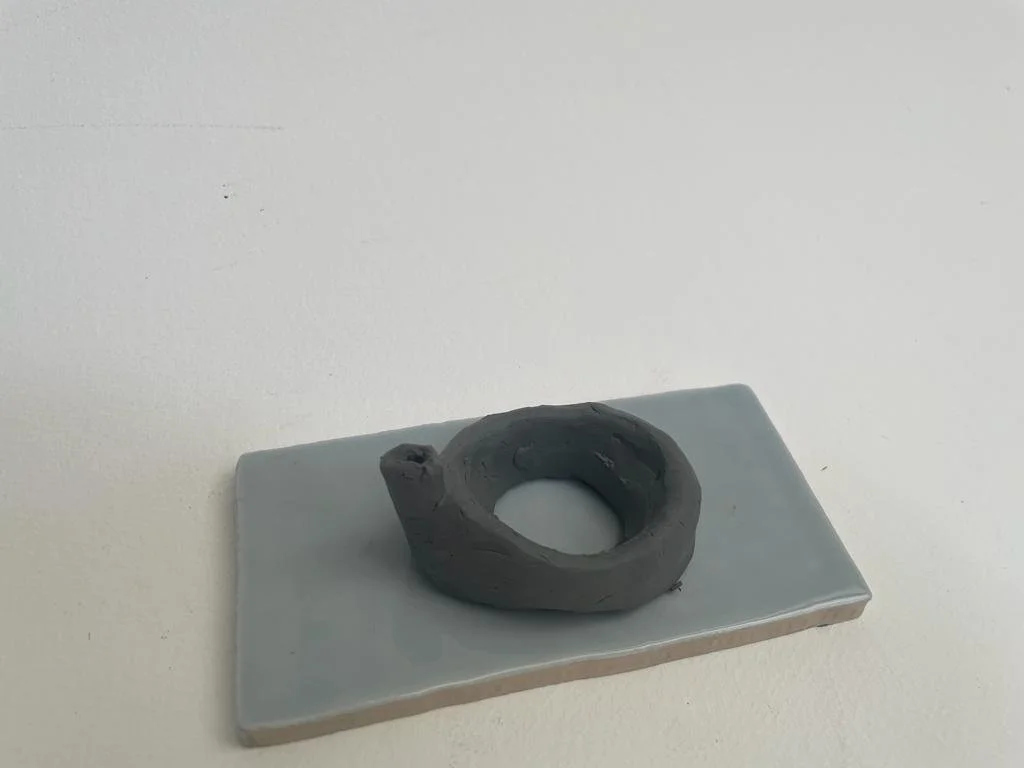
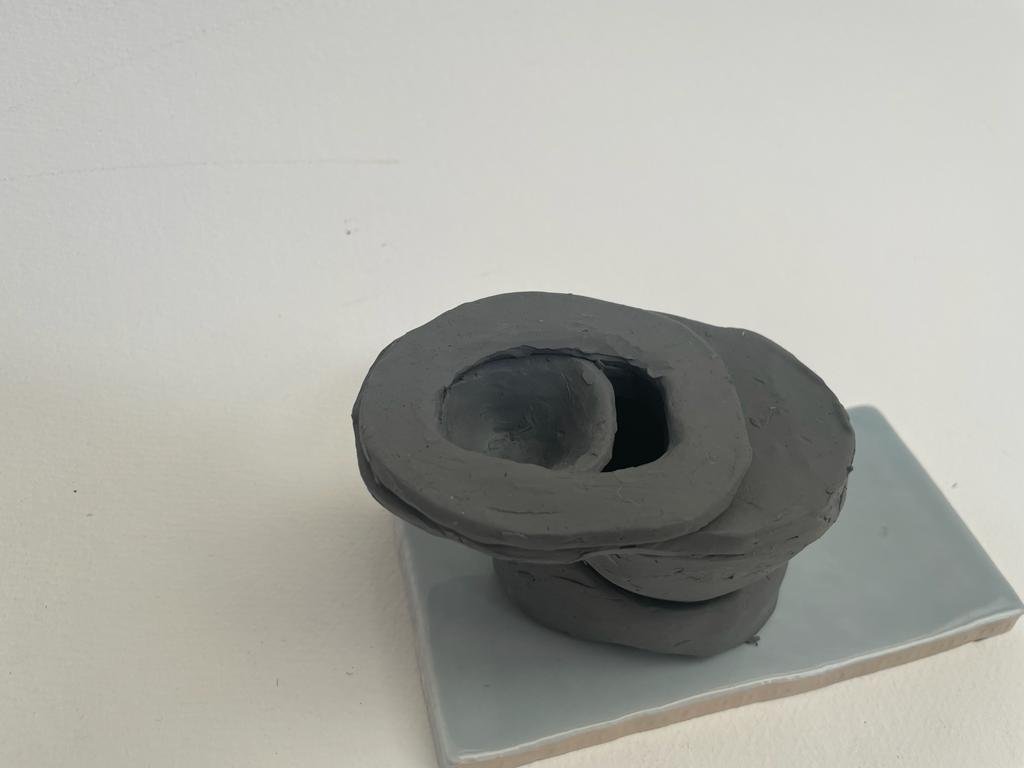
Some of the shapes in my design are quite complex and it was useful to model them in 3D to understand how the various elements needed to fit together. I worked with plasticine, an easy to use material that can more easily be moulded into the curvy shapes of my design.
I took measurements of a model figure and full scale toilet to find the scale for my model toilet.
I was then able to model the various elements, of the toilet
Having this hands on approach to the design I was able to find an elegant ergonomic solution to the toilet. The egg in the nest: a solid container that nests on the urine container.
I could see that the design would make use of otherwise dead space.
Issues with first designs:
Space or room
The toilet sits high
Management of the waste
The urine/solid separator makes it difficult for men and women to use.
By completely designing the toilet and its compartments
Ergonomic - That the feet can be placed more comfortably and body allowed to go into a squat. Therefore not to limit the user mobility.
Problem solving the design
If I could create my own shape for the containers then it would open up new possibilities to make the toilet more elegant and comfortable, rather than the standard which is essentially a box housing two square containers for the liquid and the solids.
When just a box method is used there is a dead space, the toilet height is often higher than normal and your feet can’t rest freely around the sides of the loo like in a normal toilet
Outcome
-
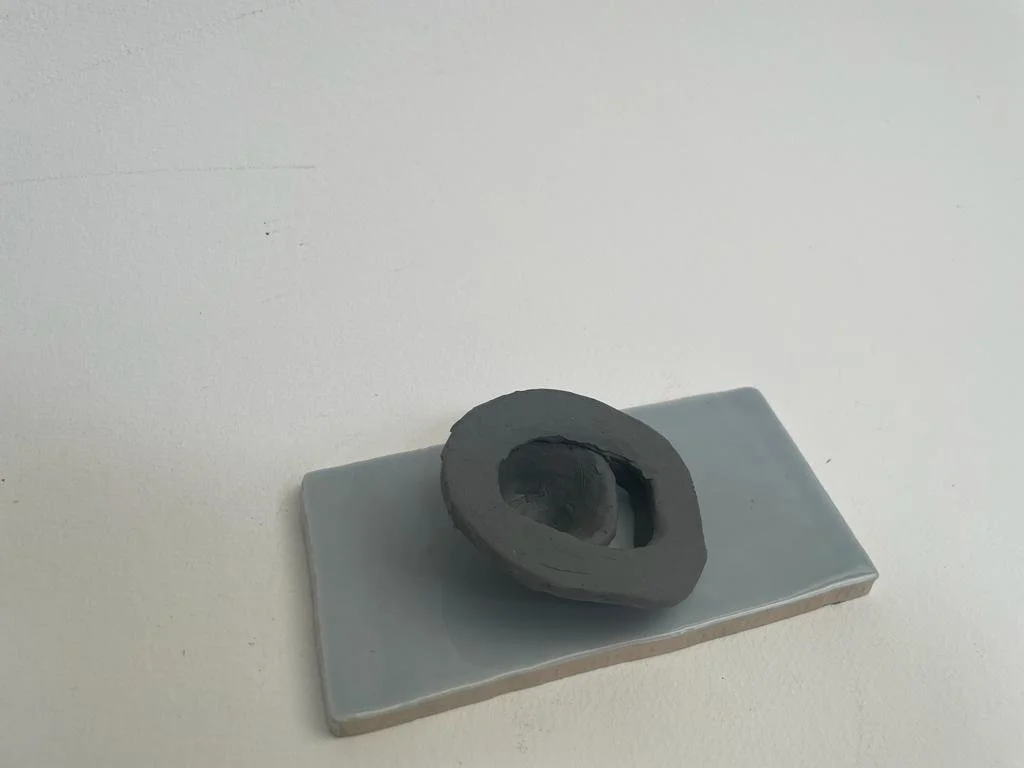
The toilet design I arrived at is the egg in the nest, an ergonomic space efficient facility for managing compost waste.
The egg shaped solid collector rests into the nest shape of the urine container, forming a solid base for the separator attached to the egg and nest containers, sealing the air gaps and combining the objects together.
These would be molded out of various grades of plastic that are designed to be easy to clean.
A standard toilet seat and lid can be fitted to the toilet separator to complete the compost toilet.
The compact design can be fitted or left freestanding into the bathroom depending on the users preference.
The collection containers will have handles moulded into for easy cleaning and decantering into transport containers.
The collection containers will have lids to facilitate the process of decantering.
The separator would then sit on top like a funnel with a small hole for liquids to drain and a larger opening for the solids to fall.
By placing the liquid hole more to the center rather than at the front this would mean people that stand to pee can do that more easily and for people that need to sit a half moon shaped section would be able to be moved around the curve of the funnel to direct pee to the front more easily by closing up the back. In the same way the back can be kept closed to the solids to keep any odors contained.
-
From this process I have learnt:
I would like to build a full size model to test if my urine and solid separator works with my desired effect.
At the time of producing this portfolio I was unable to start a collaboration with Circular Revolution, which would be an important step in enhancing the composting system. Next time I would work with another specialist or someone similar, or time manage better to allow time for responses.
To solve the issue of dust generated by sawdust, users could adopt coconut husk which stores in compact cubes and an ounce added to water expands into a dust free cover material.
Mycelium lamp
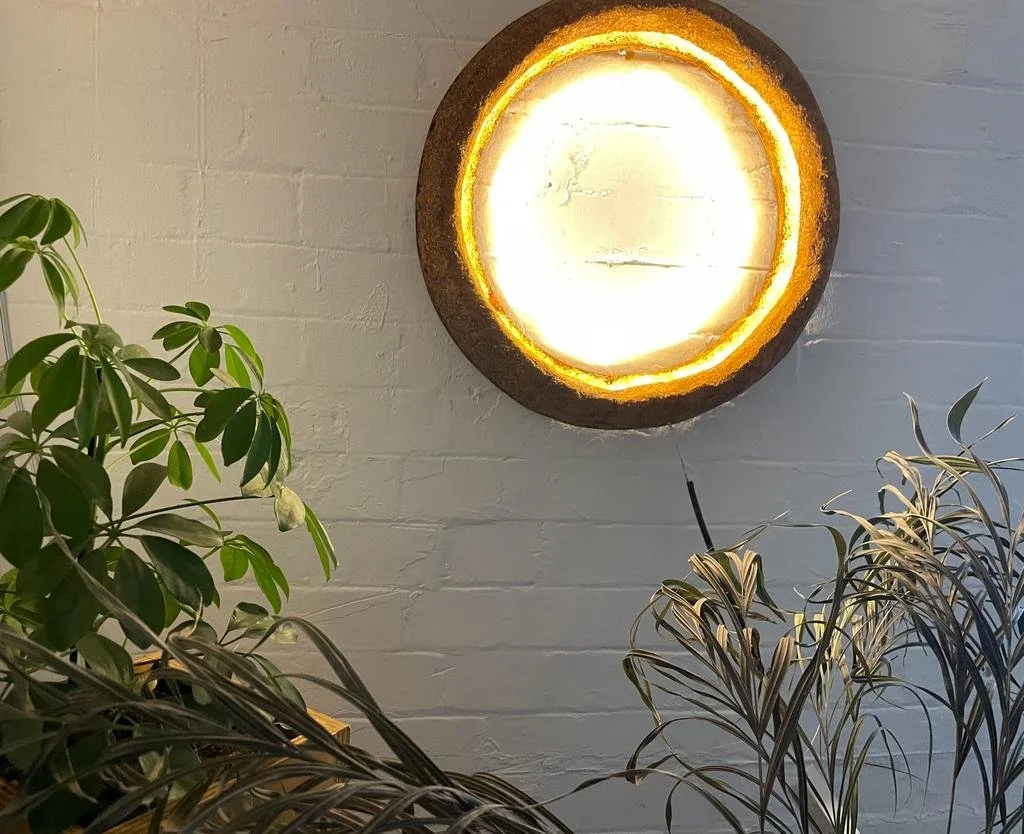
A lamp grown from mycelium. This project demonstrates using sustainable materials.
-
We are only now beginning to understand mycelium and the humble mushroom. As our knowledge grows we are starting to see this fascinating organism used in a variety of ways. It has the potential to realise circular design in new and exciting ways from making textiles, panneles boards to be used in construction and a replacement of plastic.
-
Using unsustainable materials in manufacturing products.
-
Testing Mycelium
Osmose Studio Workshop Explouring new materials in Design
Exploring mycelium as an alternative material for design I took a workshop with Osmose Studio founded by Aurelie Fontan and Ashley Granter.
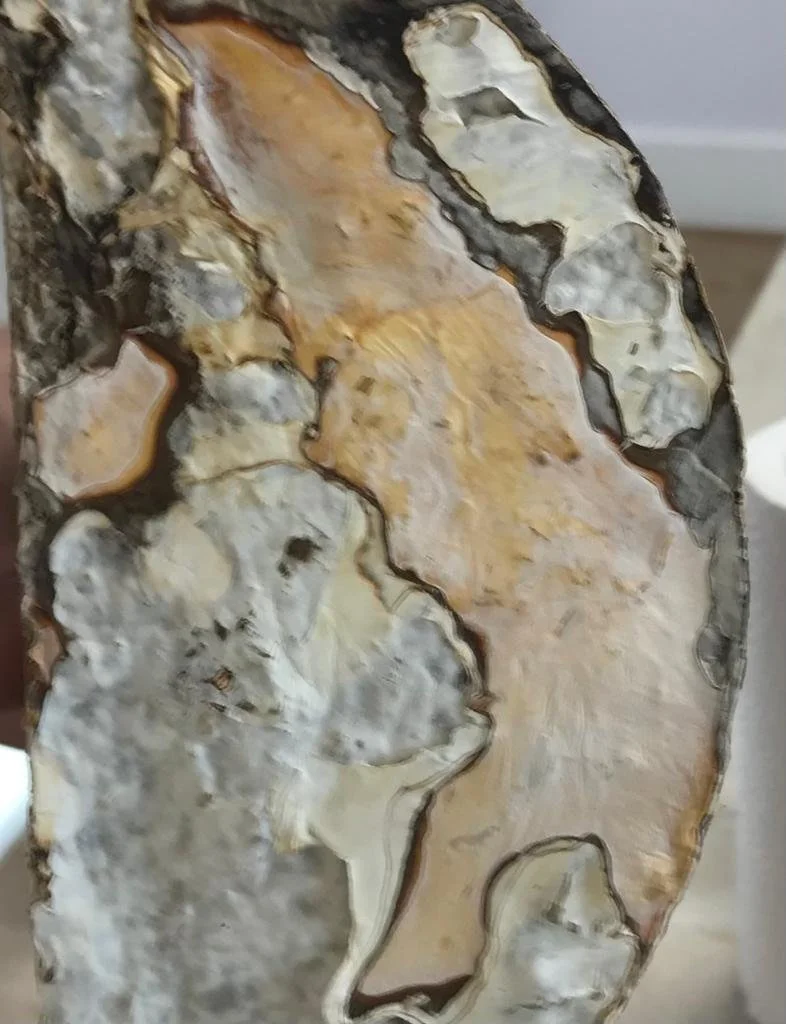
Mycelium is the root structure of fungi, the mushroom being the fruiting body which in turn produces spores. The mycelium can be grown into a mould and used to make structures or objects. You can also use mycelium in 3d printing.
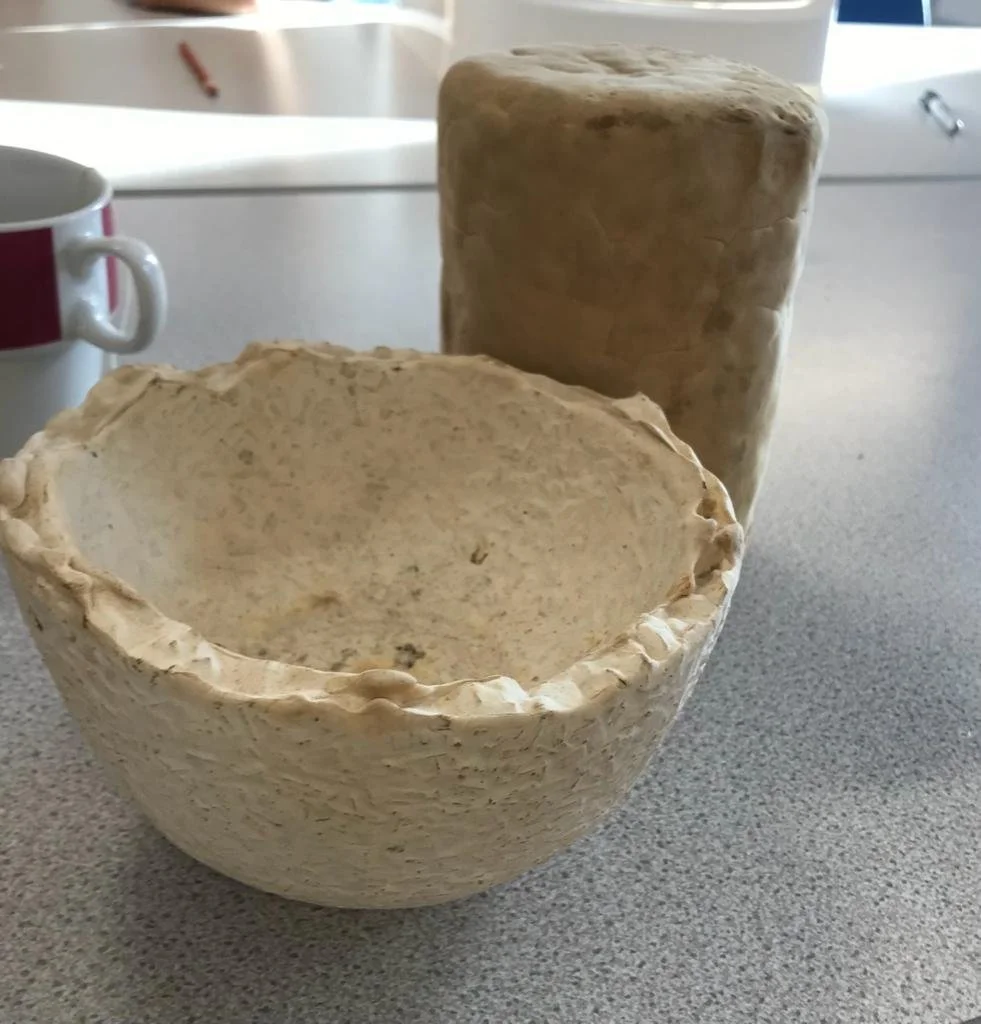
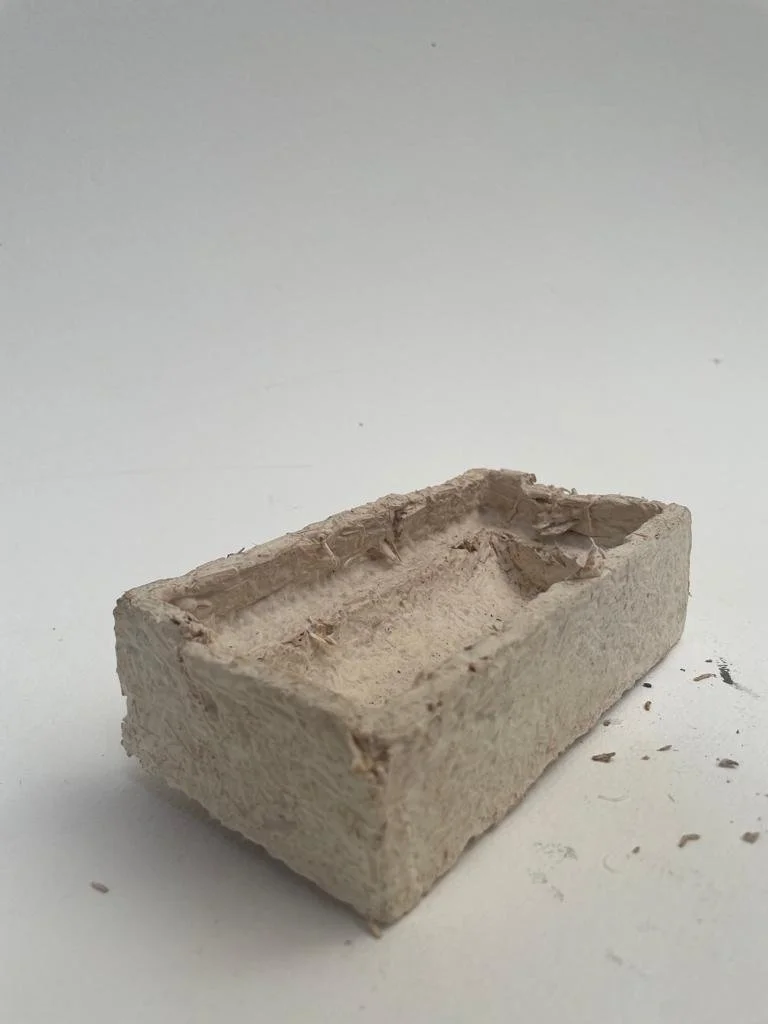
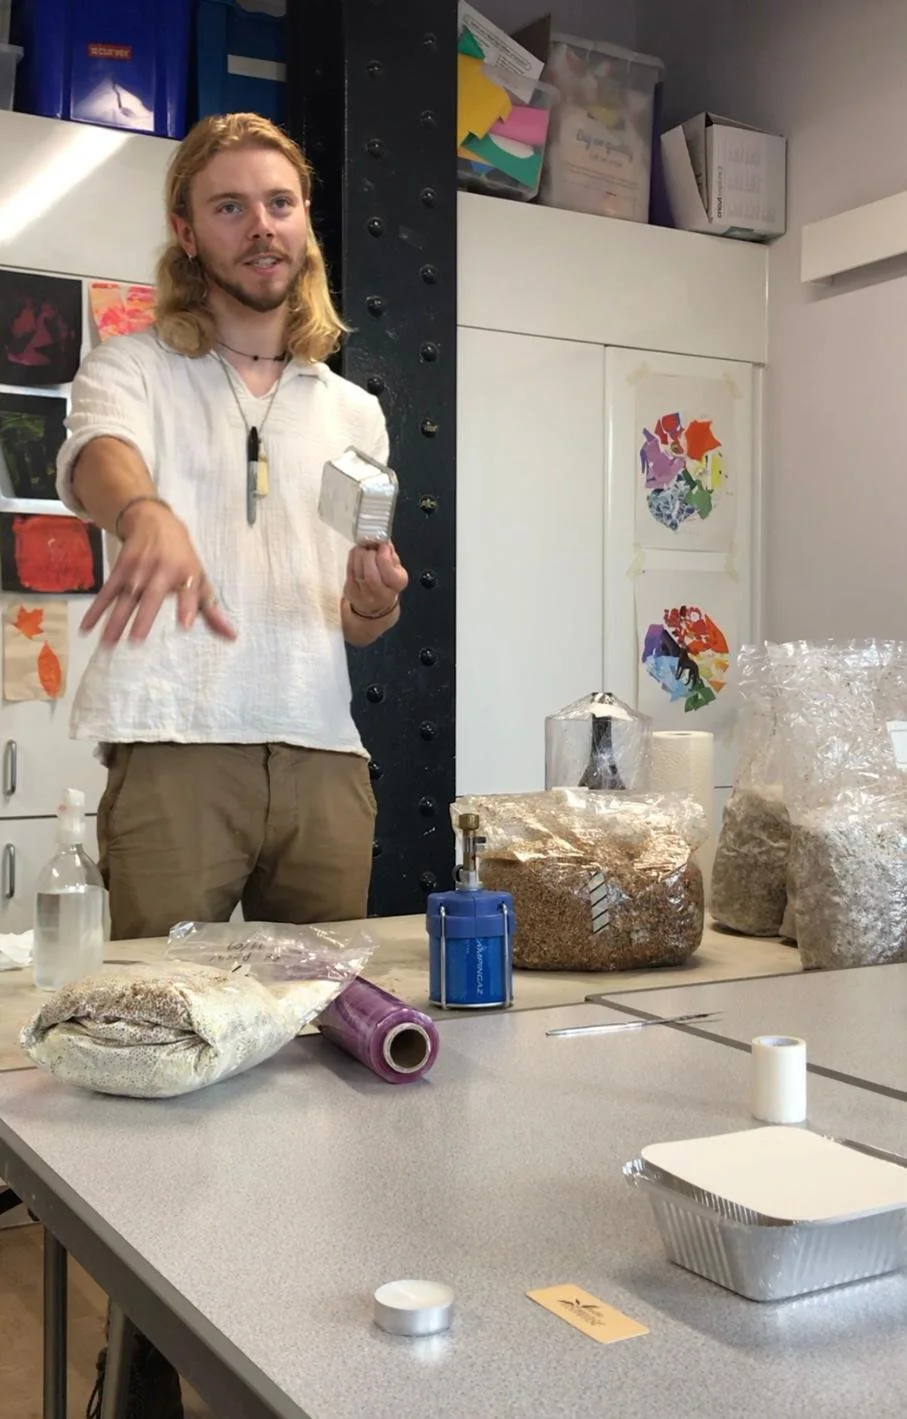
The process starts by gathering spores of your desired saprotrophic fungi, like oyster mushrooms.
The spores are added to a petri dish of sugar water in a sterile environment to form a culture, where they can be monitored for contaminants as they grow.
As the mycelium starts to develop it should be white and free of moulds, yeast or bacteria. Maintaining a sterile environment is paramount.
The mycelium can then be added to a sterile colinized material; 1:4 ratio of sorghum and millet.
Once stable it can be added to the substrate, which is a bulk material the mycelium uses for energy and nutrition. A substrate is usually a sterilised waste material like sawdust or straw, adding distilled water.
The mycelium colonises the grain and is then mixed into a bag containing the substrate adding distilled water to about 80% hydration. The substrate should be left to rest for a week or so then broken up to strengthen bonds. After 5 days the substrate is ready to be added to a mould.
design Process: R&D
Testing the Process
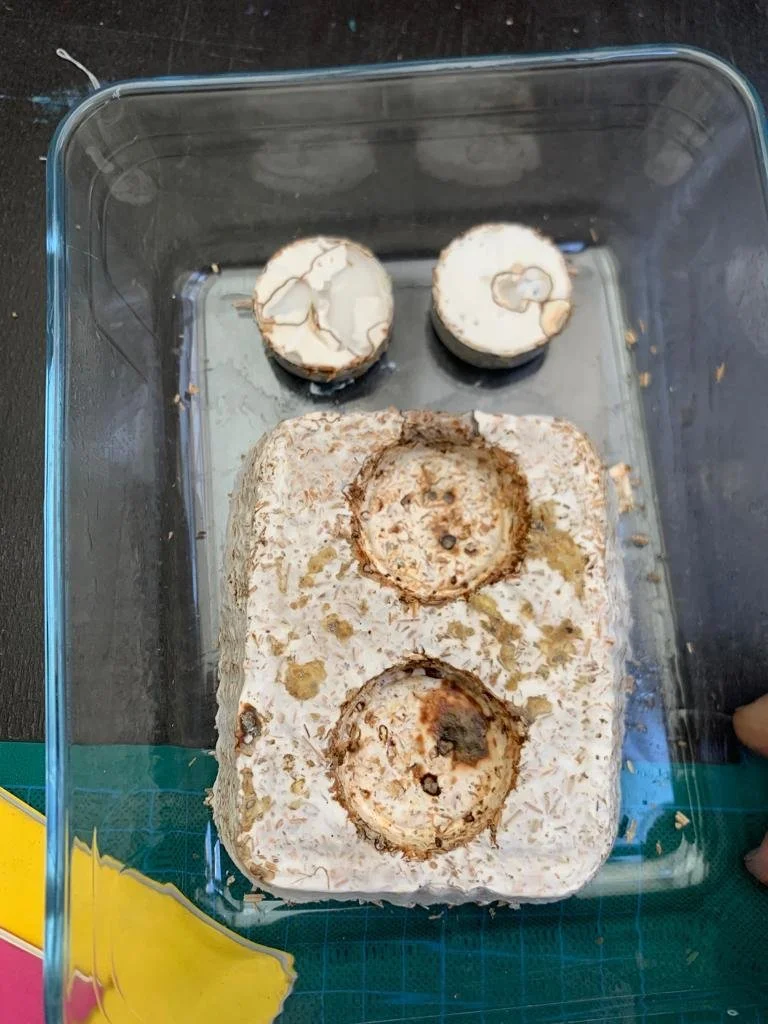
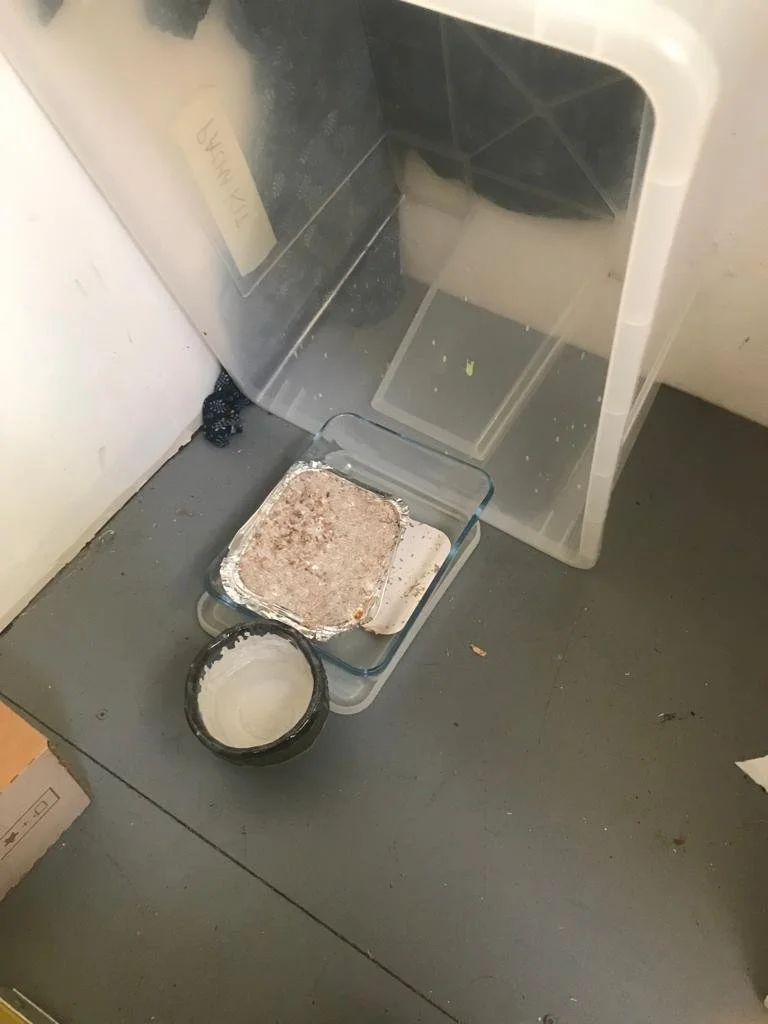
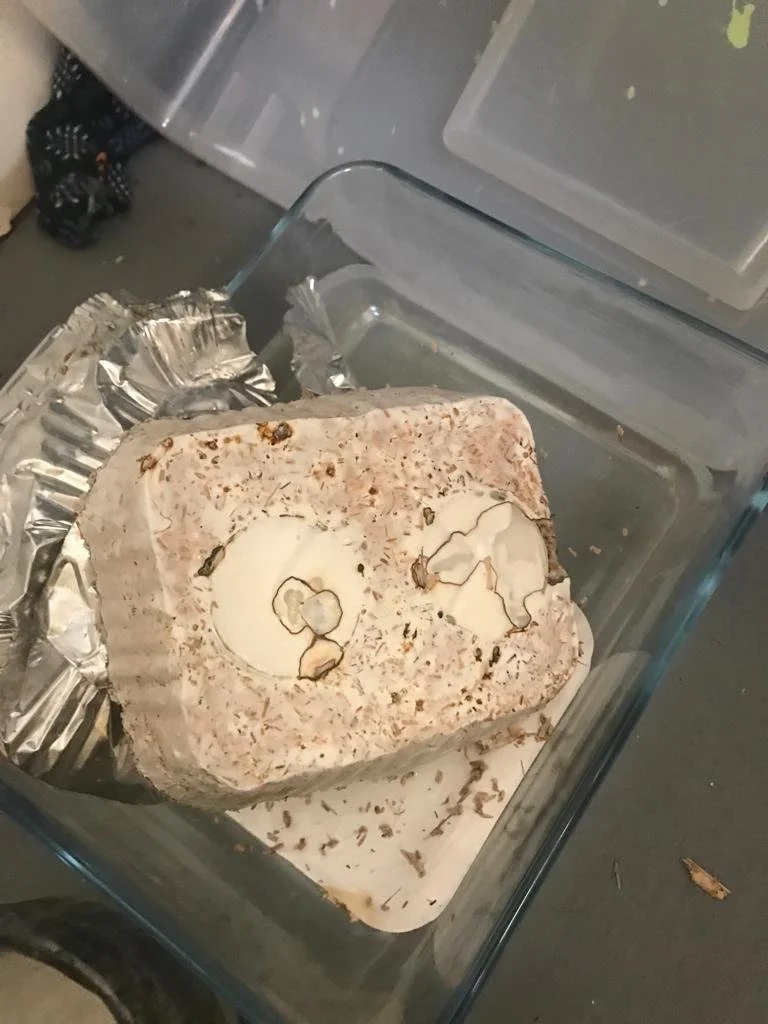
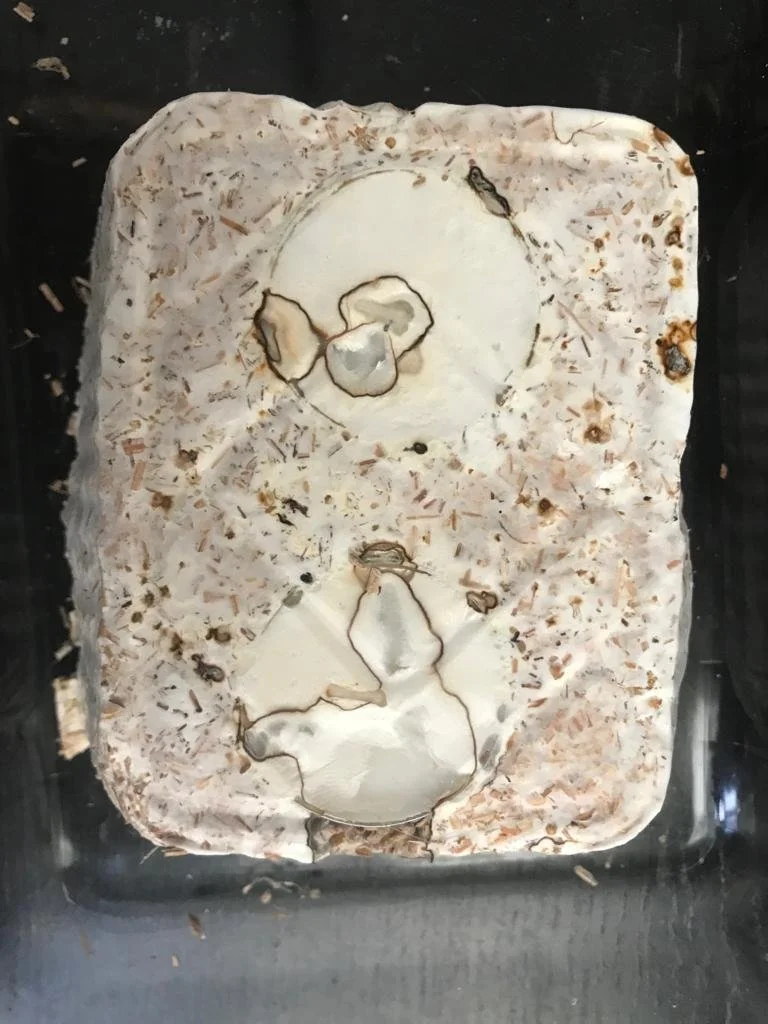
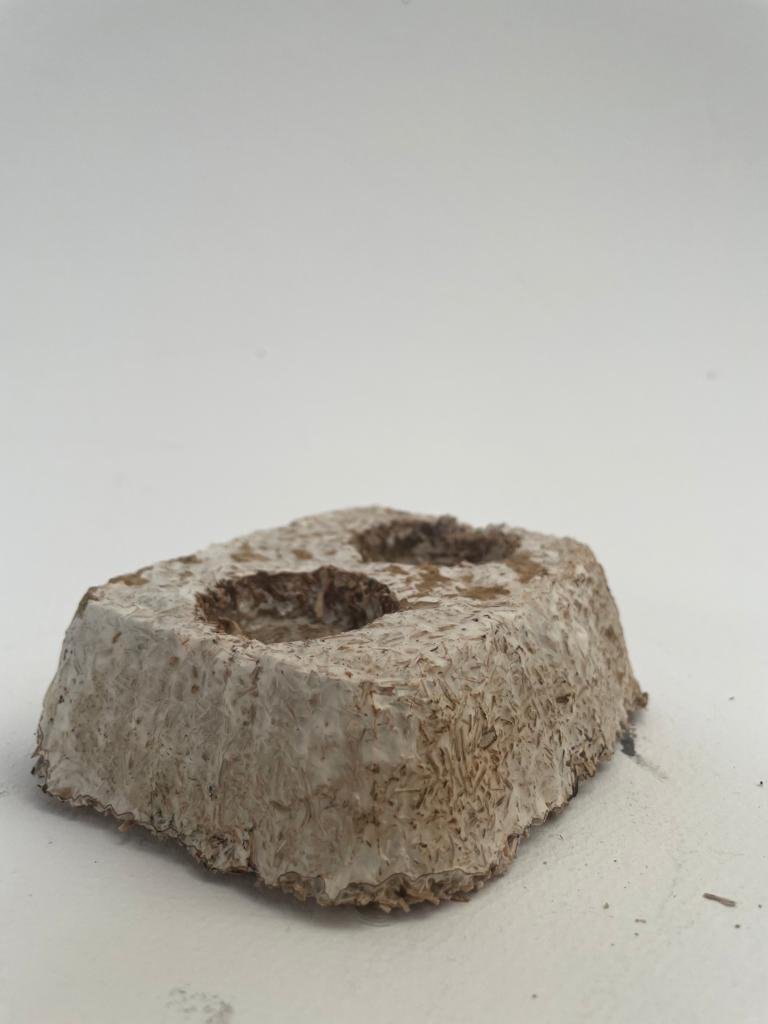
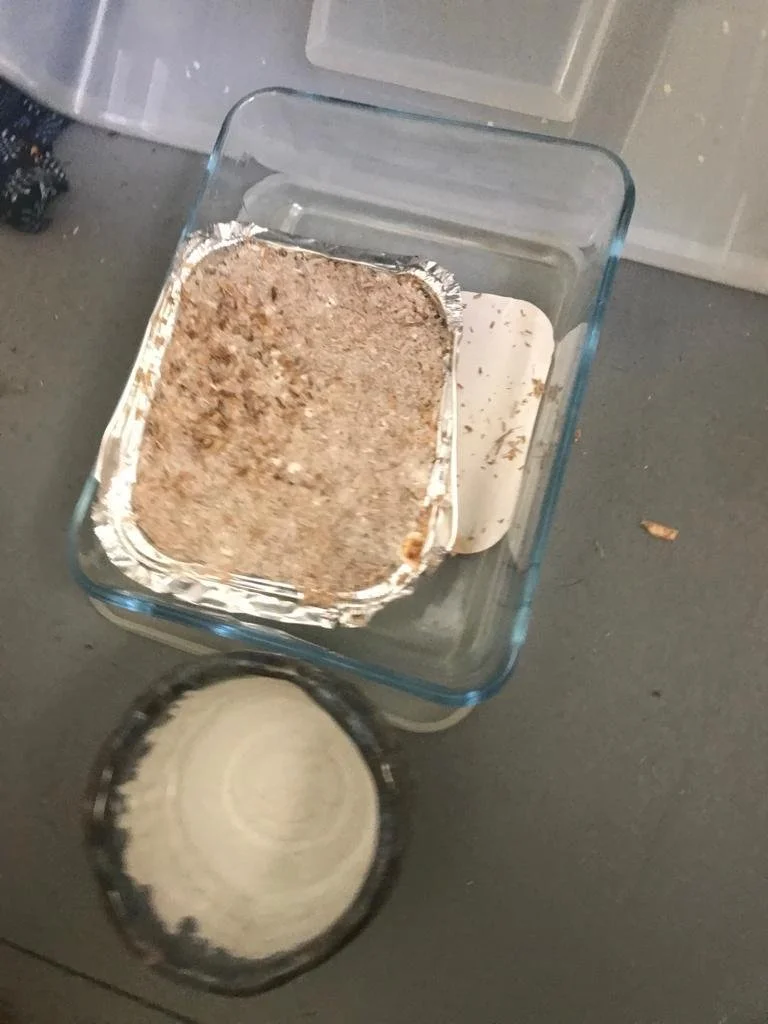
The first time I handled a mycelium product was a piece of zero waste packaging used in a Gomi speaker by design studio Gomi. The texture of the mycelium had an earthy plasticity feel and looked like marble, however incredibly light in weight, which I thought would be ideal for a light design.
With my first test, I started with a simple mould using an aluminium disposable food container that would form the base for a candle holder.
You have to ensure the work area is sterilised using alcohol spray and a bunsen burner to create a sterile pocket of air free of contaminants like bacteria and yeast.
Two tea lights were placed upturned at the bottom of the aluminium container then the substrate was added into the mould making sure it was densely packed filling all the space. The mould was covered with a lid, a breathing hole inserted and covered with microfibres tape.
The whole process takes about 5 weeks depending on the size of the mould and environmental conditions.
After successfully growing my mycelium candle holder I knew I could create something more unique in my studio. I wanted to design a lamp and realised it would all be about the mould. I wanted to use materials easily found and thought I could use empty drink cans to make a reusable mould. I explored using waste materials like beer cans as a mould, but this was problematic and not easy to manipulate into the shapes I wanted.
Final design process
While I was exploring design ideas, I looked for three options for moulding the mycelium substrate:
-
Aluminium cans were found cleaned and cut into shapes and joined with staples to try to form a hollow and interesting object for the substrate. This proved to be too difficult to work with, the cans were too flimsy and were not easy to manipulate, this would be problematic.
-
Cardboard was my next option, but by this time I had begun sketching ideas for the lamp, and wanted to make a donut shaped lamp that could be mounted on the wall or hung from the ceiling. Making a mould of this shape in cardboard was too complicated for what it was.
-
I decided to use a large electric fan cover combined with a basket and plywood ring to make a torus with a flat side. The mycelium would fuse with the plywood and that would form the base that could be fixed to the wall.
Final Process
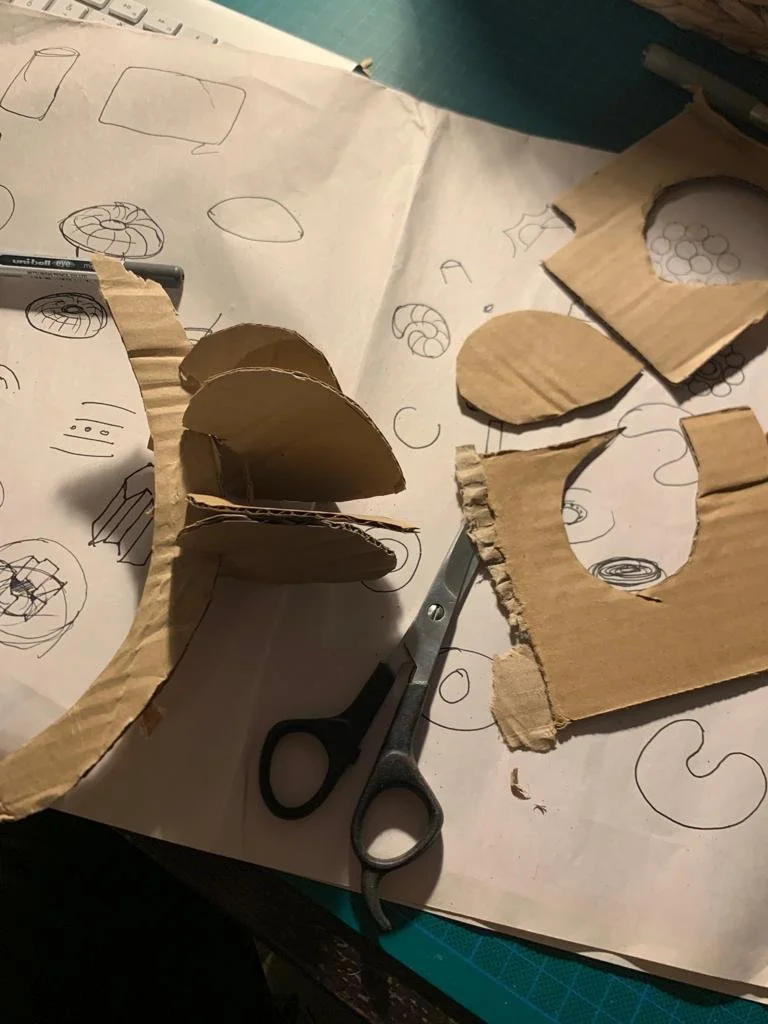
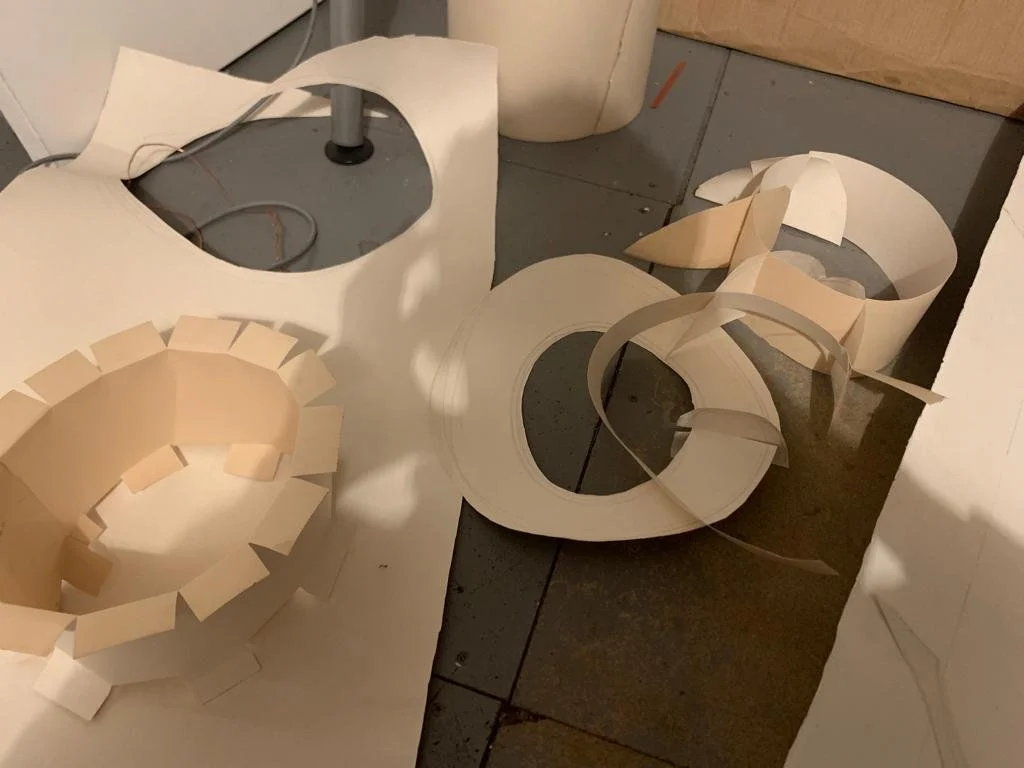
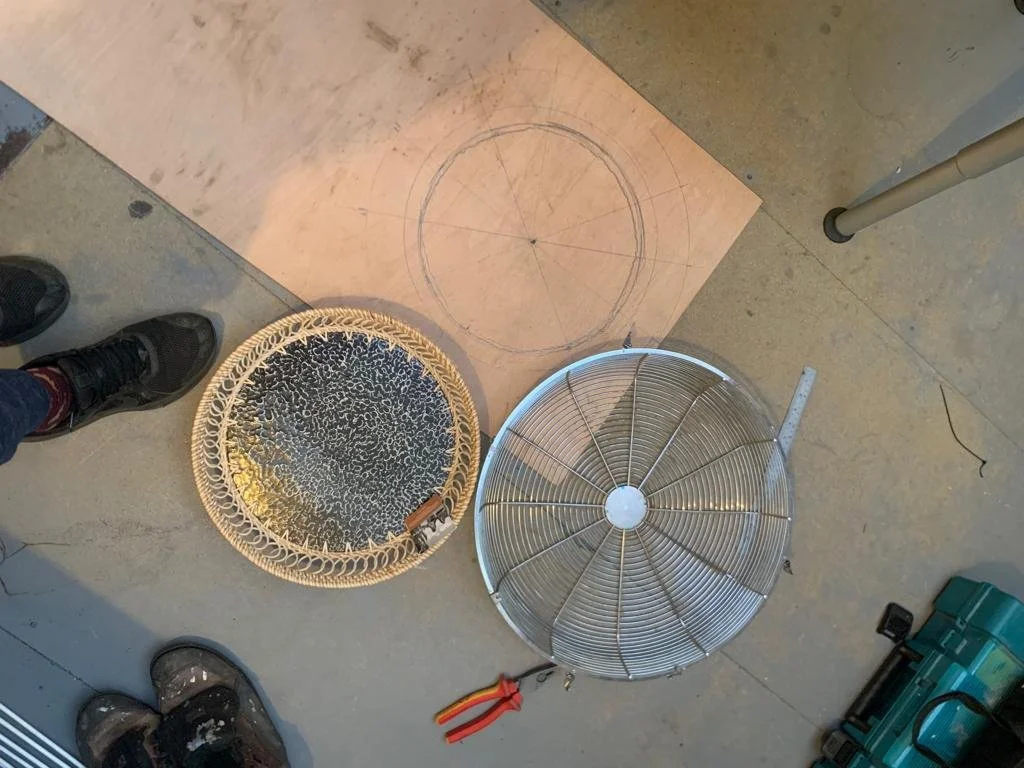
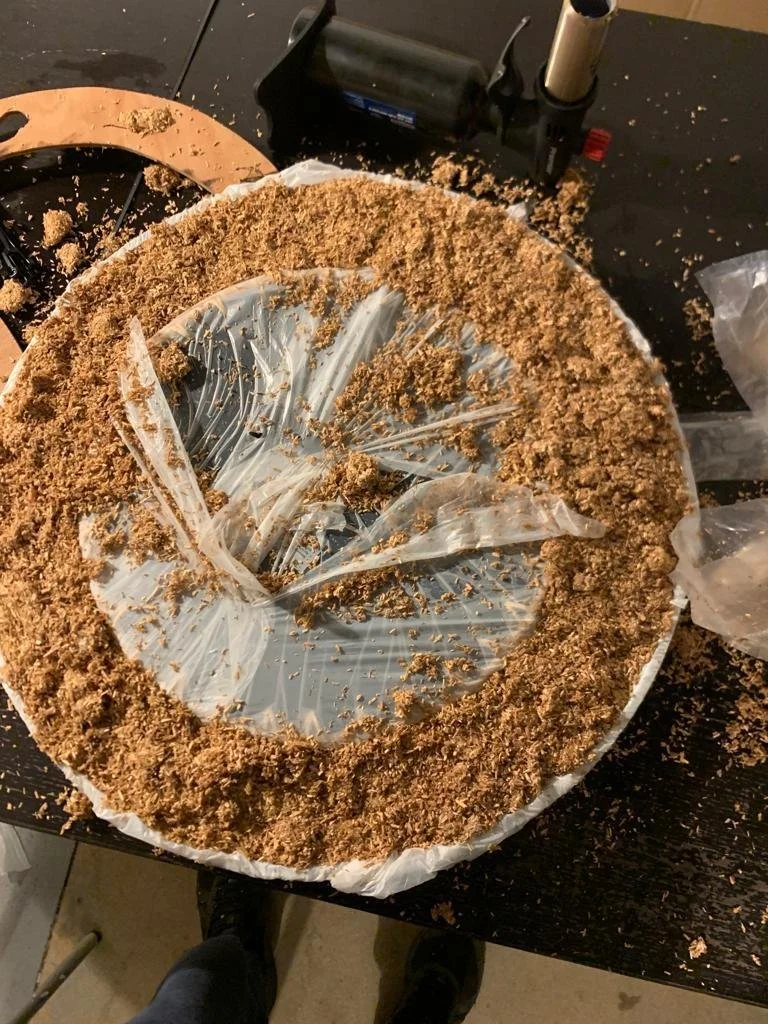
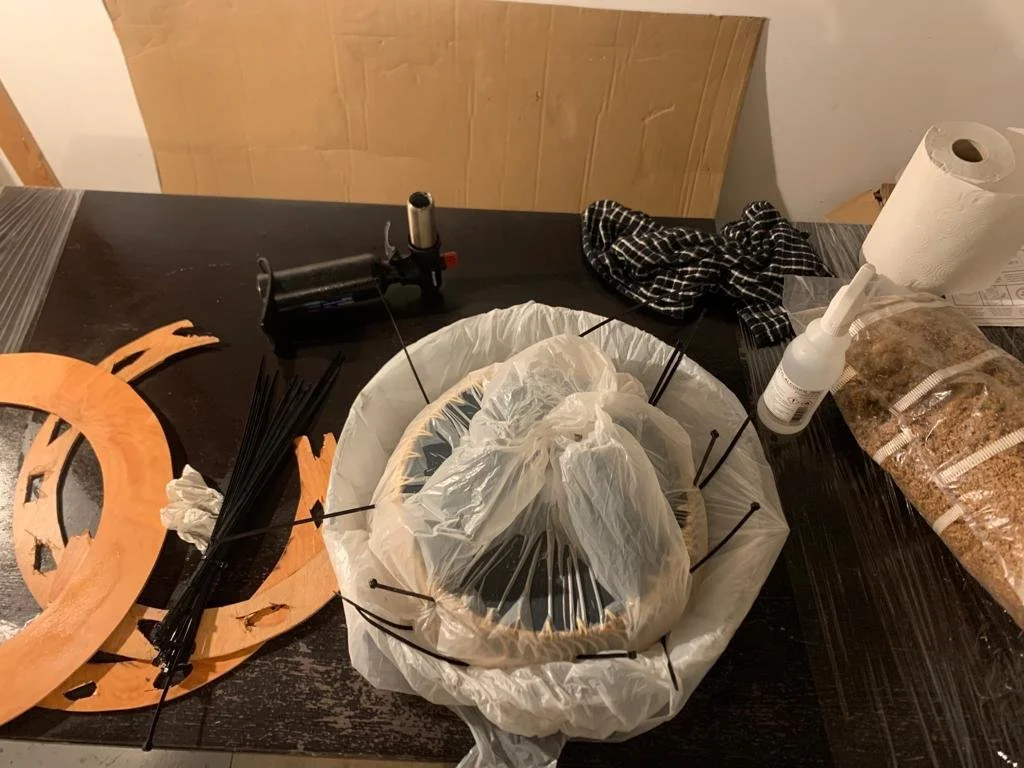
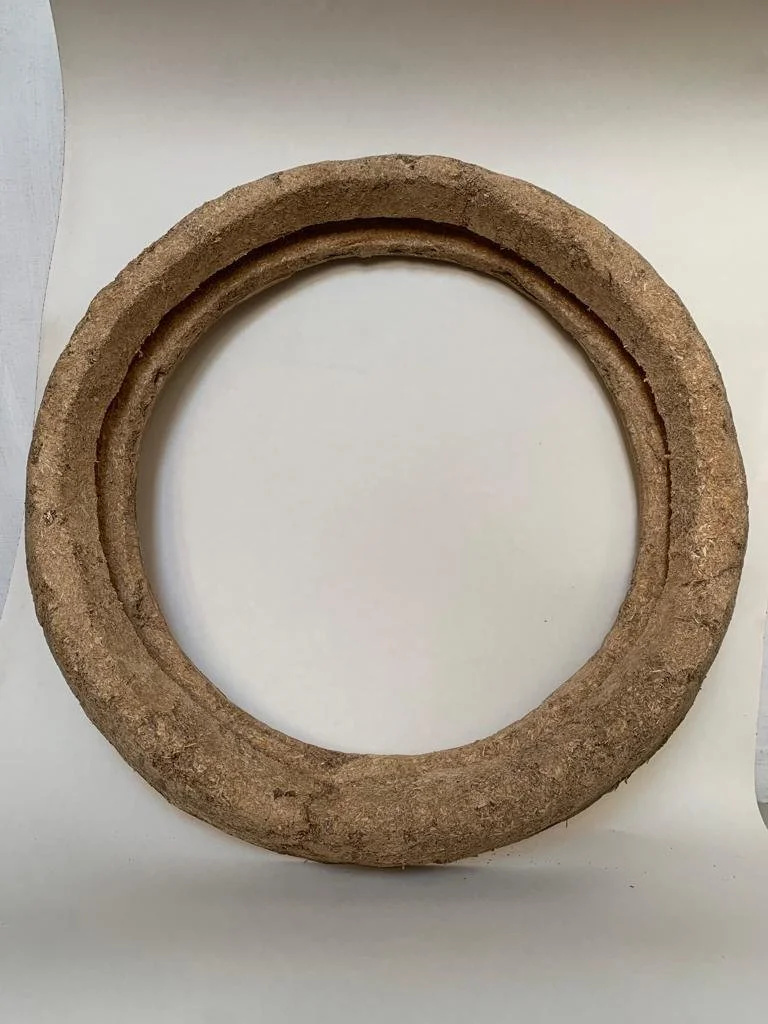
I sketched out my idea, and planned to recess an LED strip into the inner ring of the torus. Once the mycelium fully takes over the substrate and grows into the mould it will have a marble quality, rounded and reassessed angles work well in showing off the mycelium as a material.
Now I had my design and my improvised mould. My work area was cleaned and prepped and made sterile. I prepared the substrate by breaking it down and adding distilled water.
The mould was covered in plastic to contain the substrate as I packed it in densely and secured the fan, basket and plywood together with cable ties.
The mould was placed in an area with no direct sun and left to rest, and after a week the mycelium had colonised the substrate and fused with the plywood base. The torus shape was removed from the mould.
The torus was then placed into a plastic bag as I did not have a larger container to keep it incubated as the mycelium grew to completely ingest the substrate.
After another couple of weeks and not in the best conditions the mycelium was found to have been attacked by black mould. Unfortunately I would not get the marbled quality I was looking for, but I still had an Interesting shape for a lamp holder.
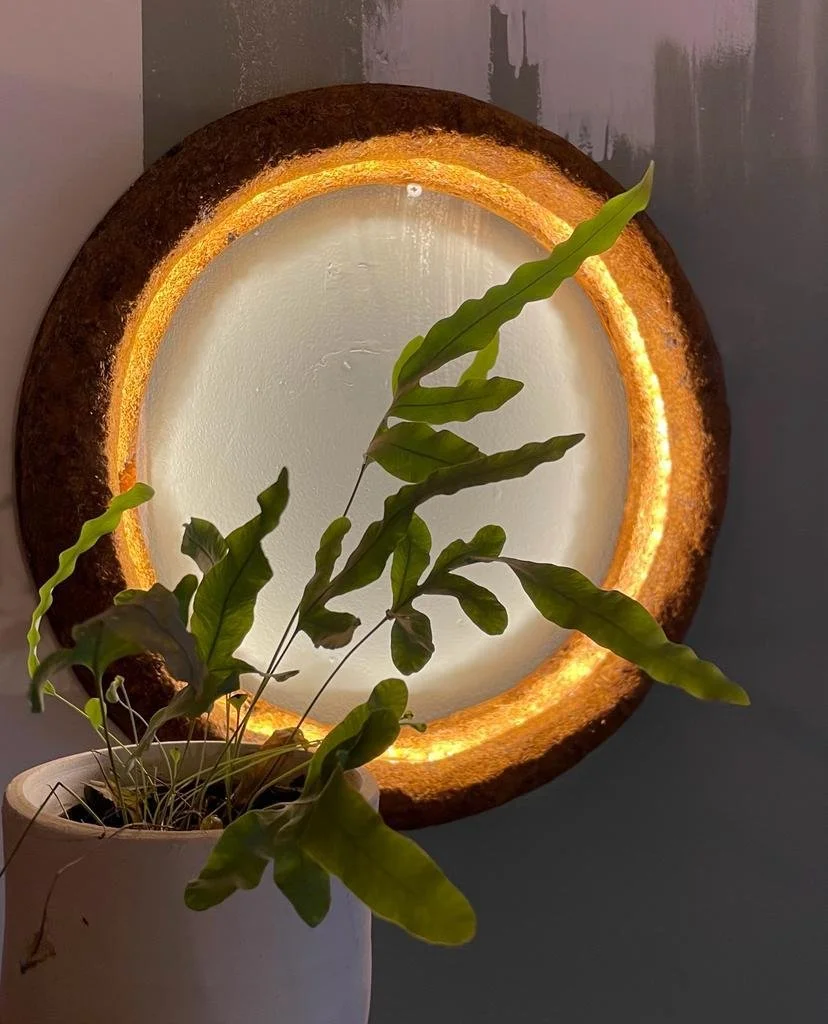
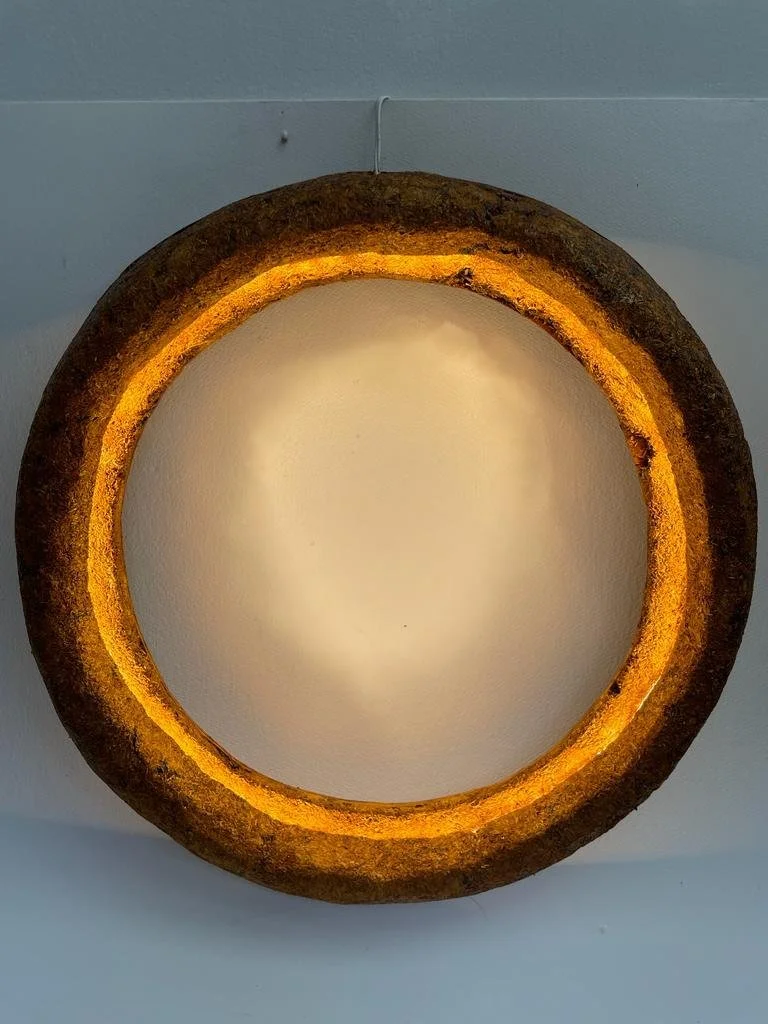
I dried out the torus lamp holder and sanded it down and painted on a natural beetle resin to finish. The LED strip was inserted and we now have light.
-
In order to realise great design with mycelium a rigorous procedure needs to be followed. I was unable to achieve the desired results because I did not have the best setup to control the environment.
I learnt in this process that I need to learn how to use computer aided software to create accurate designs. This digital design can be repeated and transferred on cardboard where they can be formed into 3D moulds for the mycelium substrate to colonise, a much faster process.
In my research of new materials I found the company Blast-Studio who have a process for 3D printing mycelium. This could open up a whole new range of possibilities in Design which I would like to explore.
PACHA: COLLABORATION
This project demonstrates my ability to collaborate with professionals in a
trans-disaplinary approach for a project that is about serving community through art.
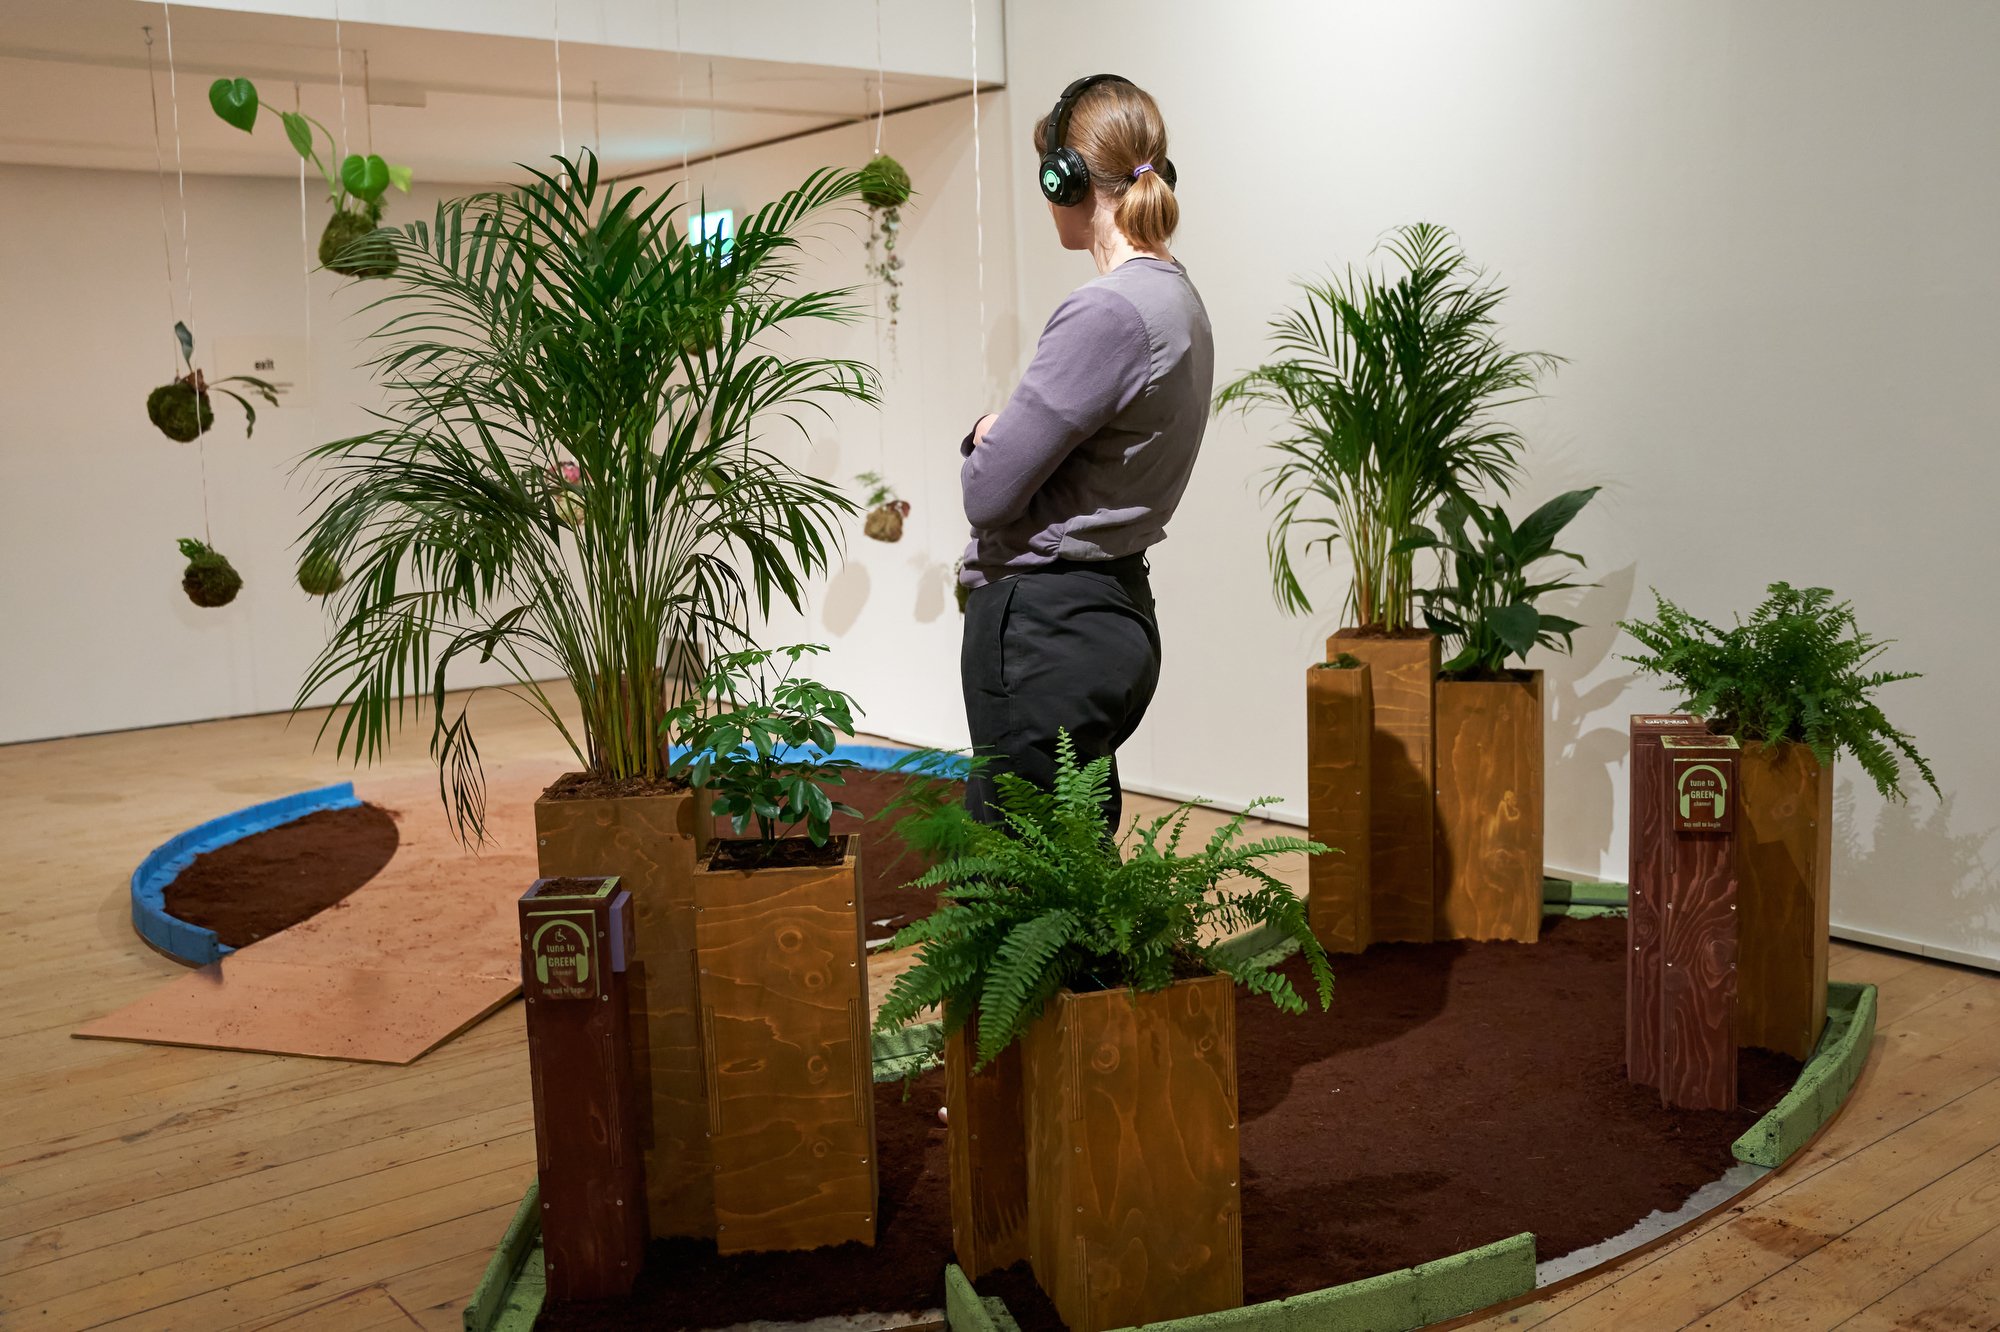
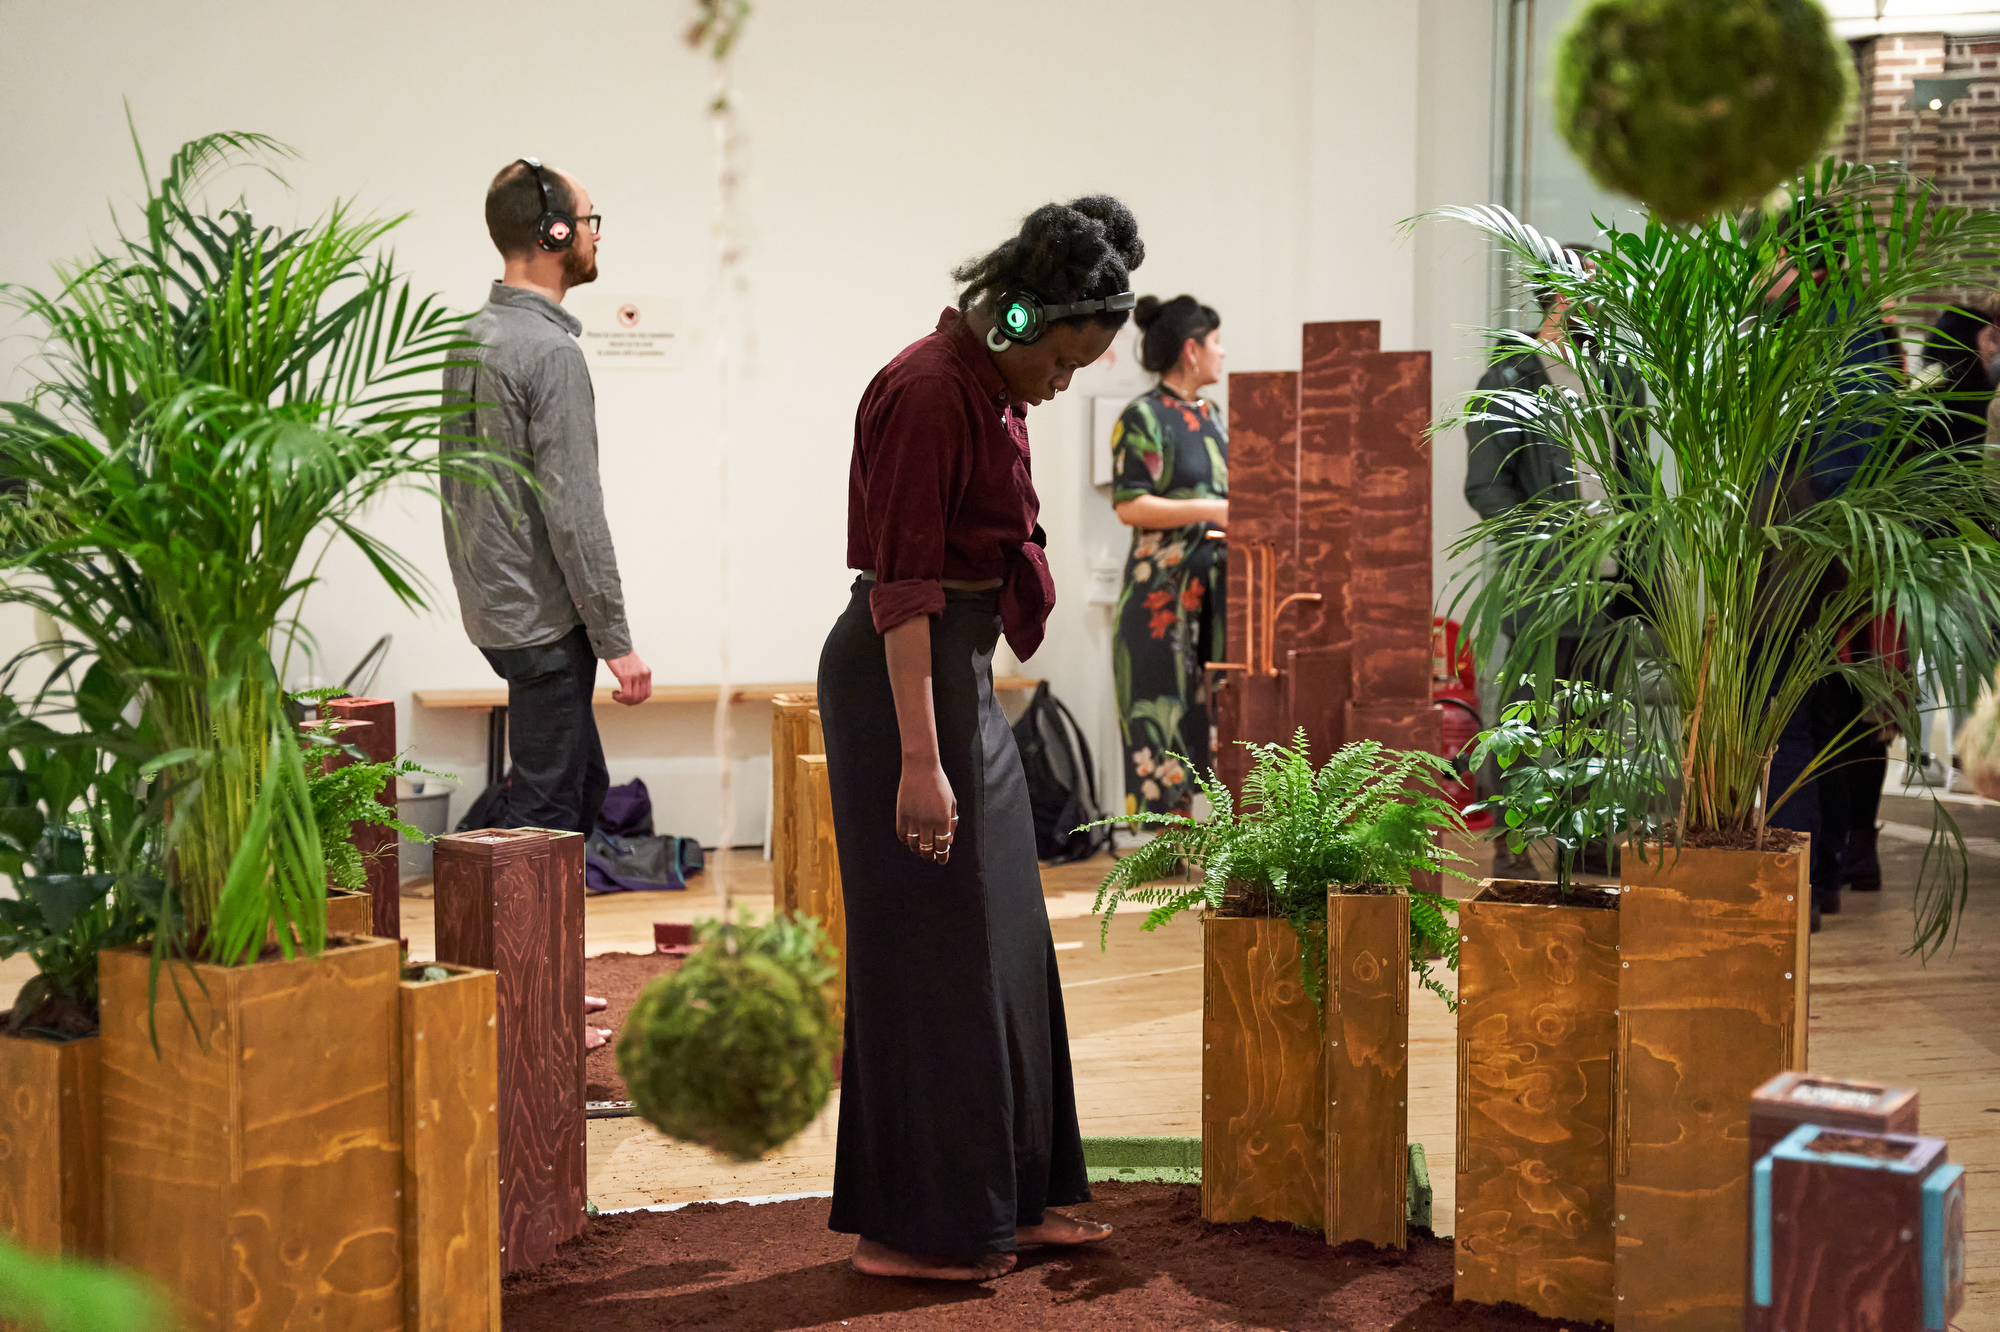
PACHA is an touch-responsive-sound installation of plants and soil that tells stories of ecological symbiosis, ancestral knowledge and reimagined futures. It is a decolonial response to the climate crisis designed to rekindle our bond with nature in an explorative and playful way fusing technology and the natural world. PACHA exhibited in London at the museum of the home in Hackney and Bernie Grant Arts Centre in Haringey,
-
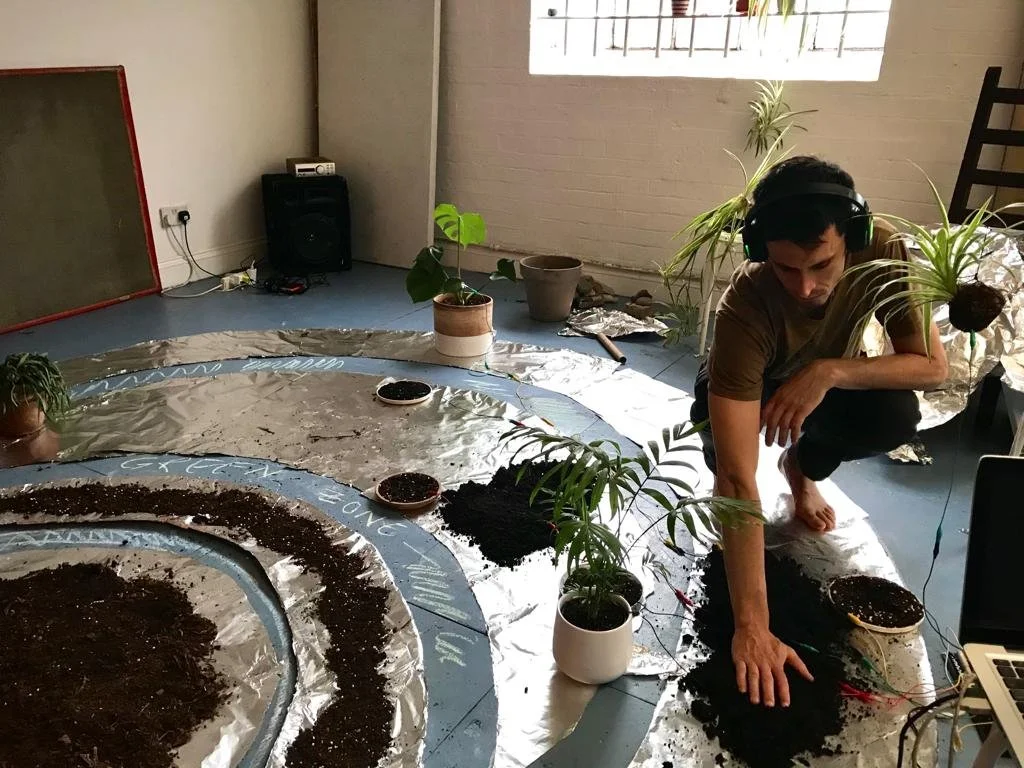
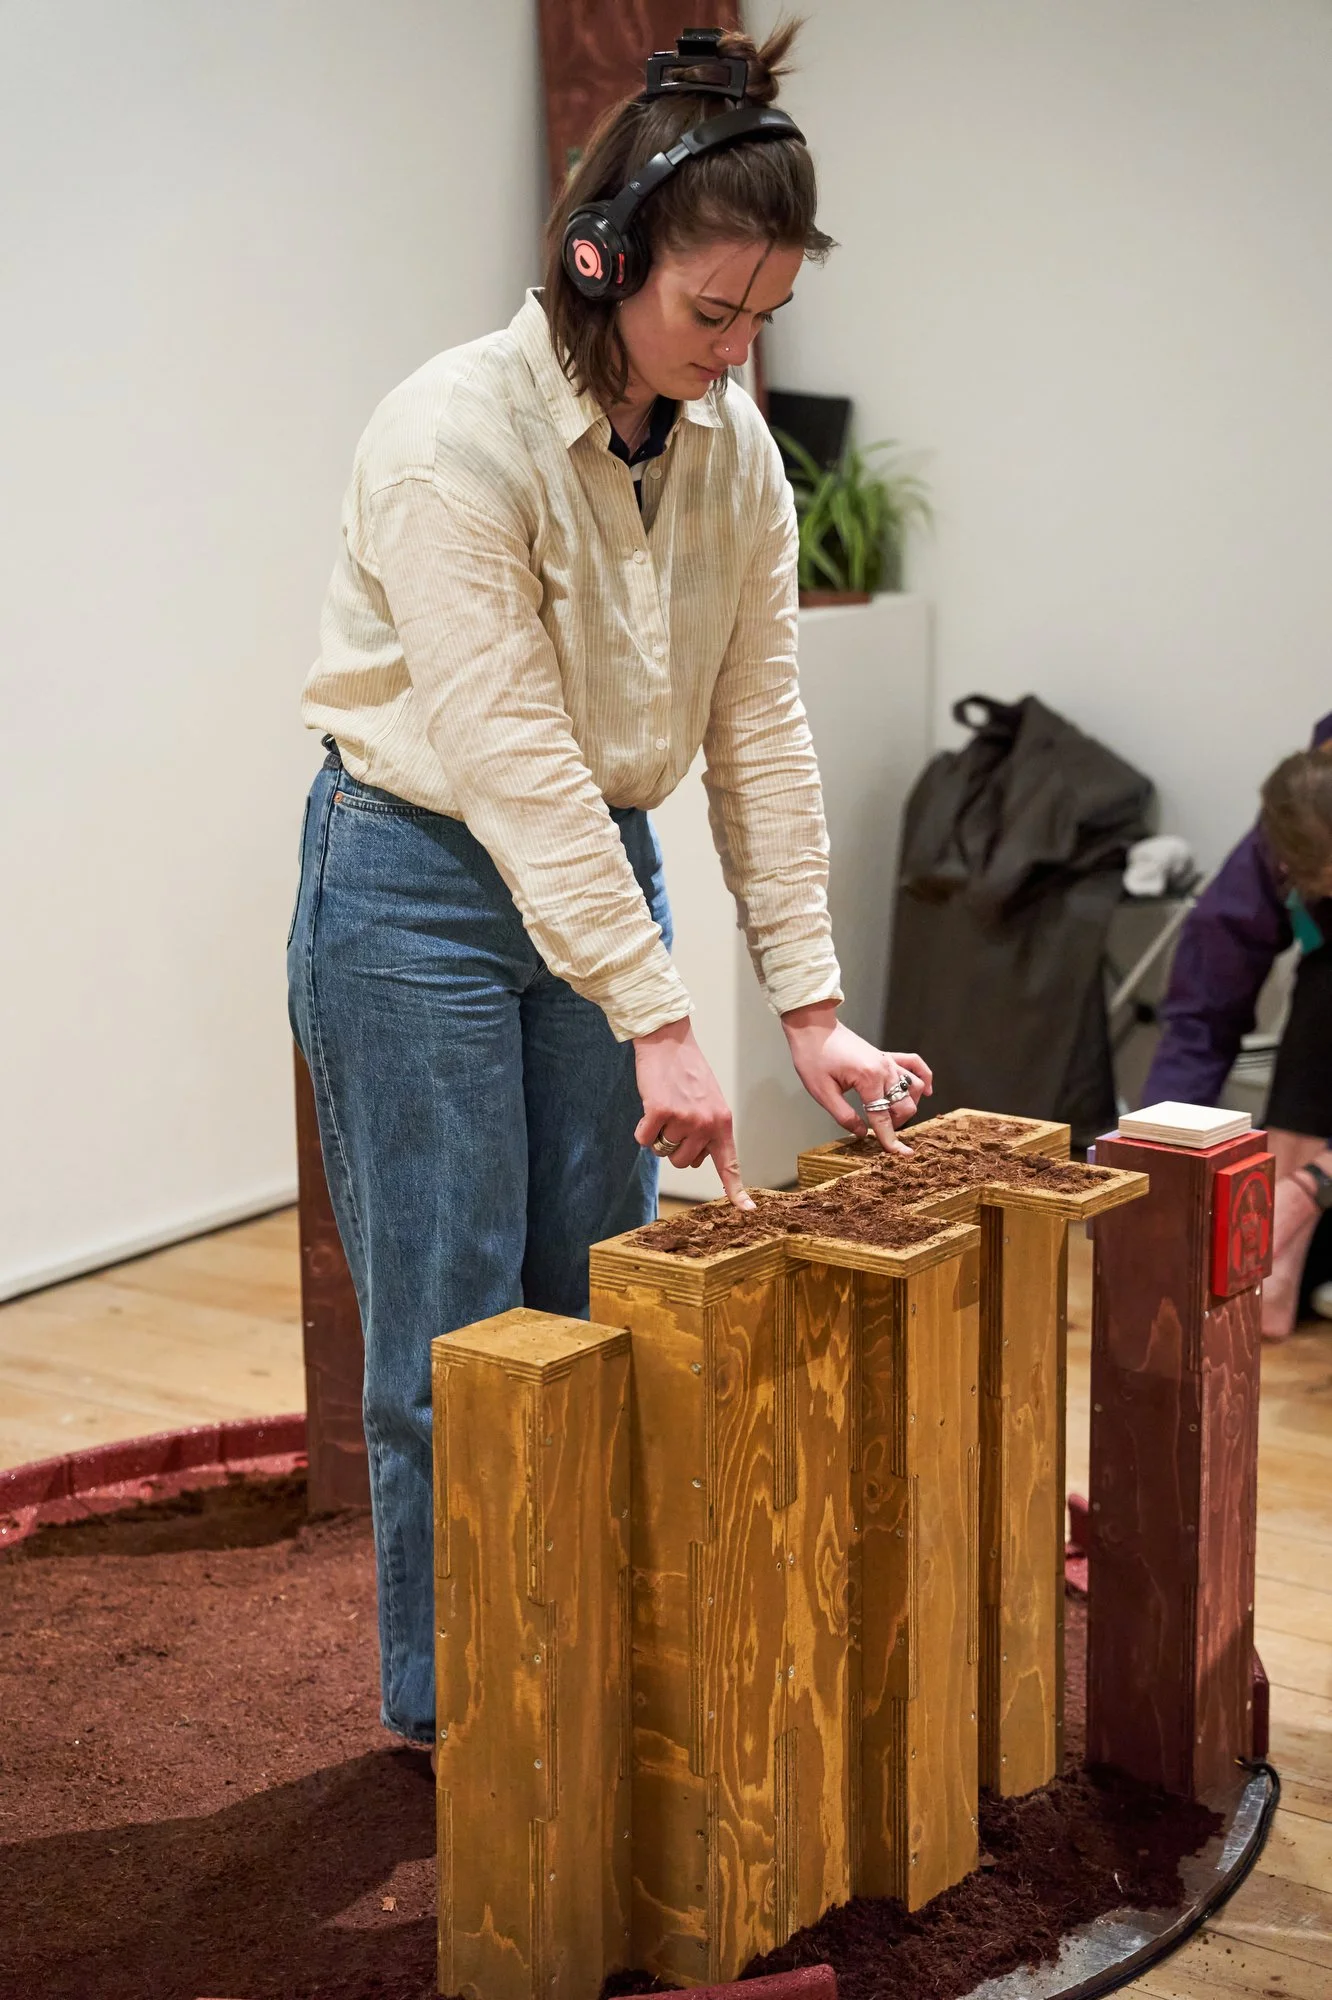
The interactive touch technology is a simple circuit between plant and person. There needs to be a ‘circle/ circuit connection’ from plant, soil to skin. For example, if I touch a plant outside of the installation, no sound is triggered. I need to be standing bare foot on the soil (a conductive surface wired to X), which is connected to a plant and my bare hands touch a plant which is connected to the soil. - a full loop created with body, soil (floor) and plant or raised soil. This is then read by the tech like a midi player which plays a sound into a headphone through radio transmission.
The installation is meant to be experienced barefoot. So the soil areas are conductive and connected to plants. When an audience member stands on the soil and touches a plant, a full circuit is created and sound is triggered. There is no electricity to plants or soil, the installation uses the natural electrical energy humans and living things have.
-
Collaboration:
Interdisciplinary artist Andrea Ling from Pacha People approached me to help create a interactive sound installation. She was interested in my experience of electric cable installation, art and moving into design and appointed me technical designer. My role was to:
integrate new Playtroncia technology into the Pacha sound installation within the design.
Support in the design to making process. Which included experimenting with appropriate materials, problem solving, budget and working to specific time frames.
To lead on designing elements for diverse access needs which included wheelchair access.
Process
Designing for tour:
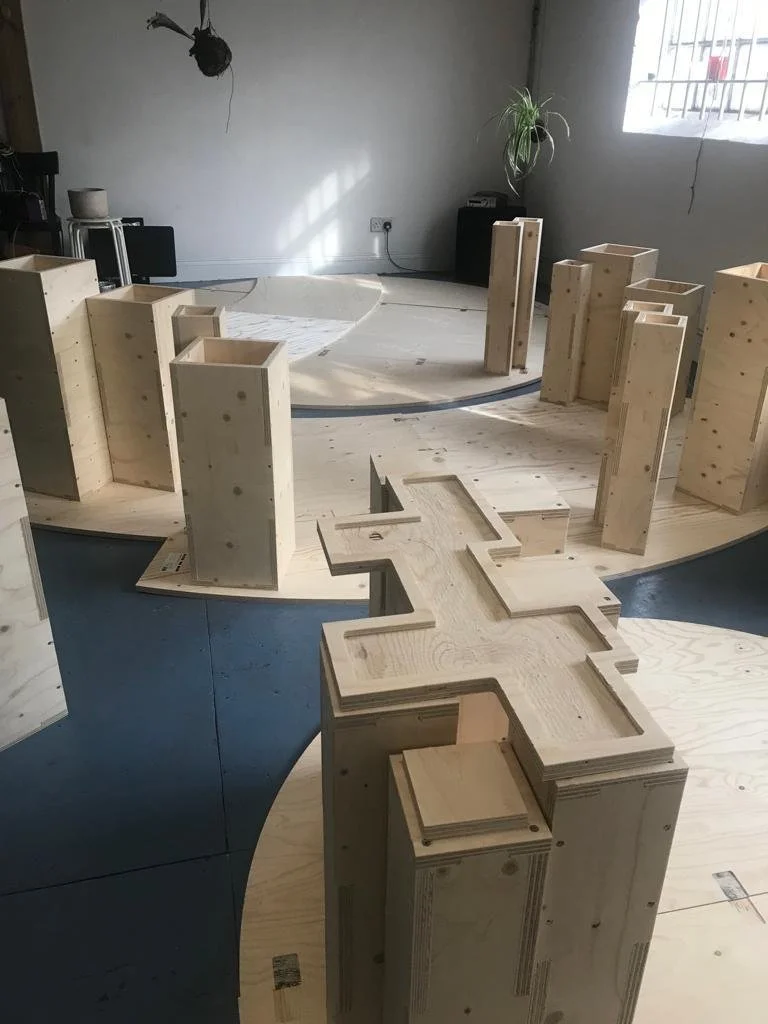
Andrea needed me to help design and build a set that would tour in various locations around the country, be reusable, modular so it had flexibility to adapt and change formation and simple in set up. Andrea and myself worked with U-Build who would be fabricating the set pieces using a CNC machine.
2. Integrating technology playtronica
We had to figure out how to incorporate the Playtronica device into the installation so that the audience could interact directly with soil and plants. We trouble shooted what sustainable materials we could use to conceal wires, where to place them and what conductive material we could use that was cost effective and sustainable.
I came up with the solution of using thin 1mm conductive tape, typically used in the construction industry for pipes.
3. Designing in response to access needs
The grounding of the installation was made of soil and audiences were invited to take off their shoes. This allowed full conductivity and an immersive experience with plants and soil.
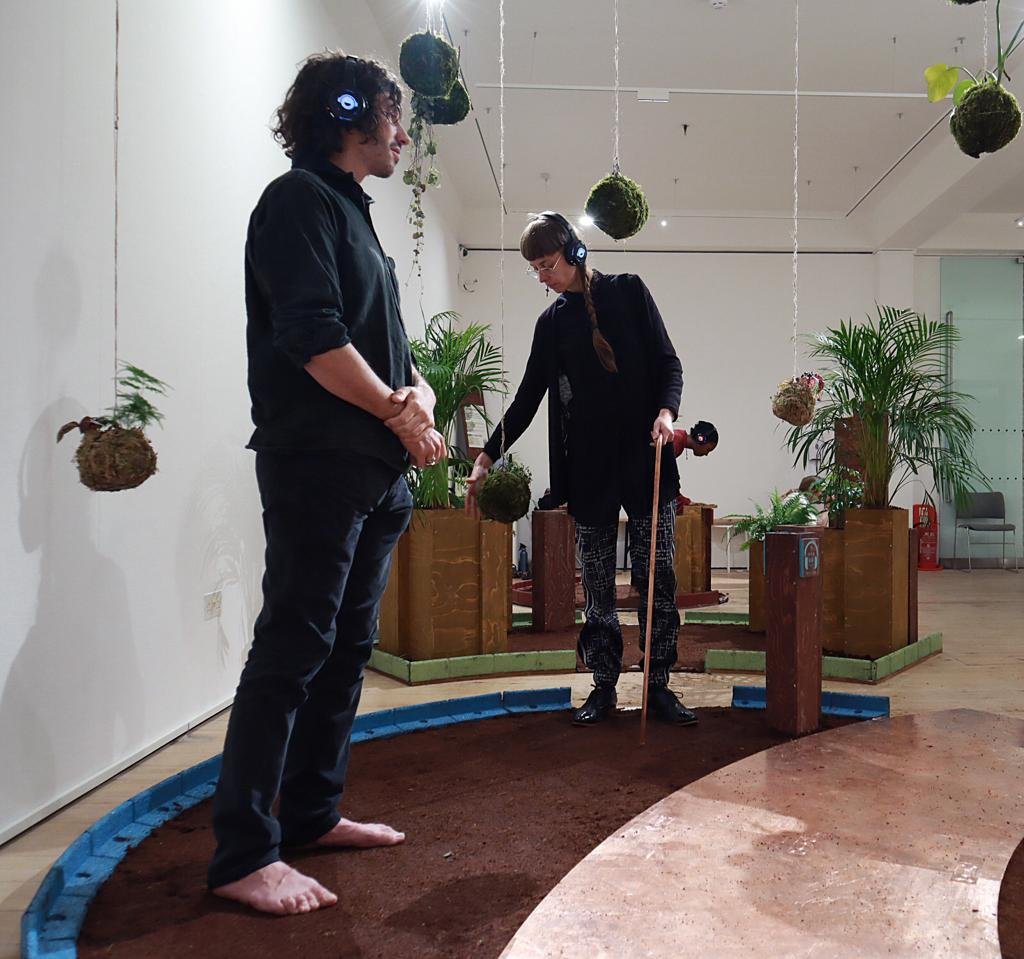
As the installation was on a slight raised platform of soil there needed to be integrated wheelchair access. Not everyone can take off their shoes so we needed to problem solve how to make the installation fully accessible. My job was to design a way where people in wheelchairs could have a connection,
Collectively we came up with a solution to create raised beds, a wheelchair ramp and I came up with copper canes for those who didn’t want to take off shoes or could not due to access reasons.
-
In evaluating the set design, the modular boxes were fitted and designed beautifully however time consuming to assemble and breakdown. It had too many unnecessary screws and was over designed by U-Build. As the set is not permanent it would have been better to design an assembly that was secure but quick to build. As part of my role of technical designer, I have learnt that within a collaborative process to ask and understand how each element is constructed well so I can anticipate issues with the brief.
I don’t think this is a you evaluation, I have tried to make it about what you may have learnt, I would add something else. Like how I wanted a bette finish on canes, simple making process, ends so it didn't scratch base. a more simple wiring process etc